Thursday, August 16, 2012

Tart Making 101


As you may know, I've been on a huge macaron bent lately. Eating and making all things macaron! So, I decided that with an entire 2 months off this summer I would take time to learn how to make tarts. Tarts you say? Yes, tarts such as flans, sweet tarts, rustic tarts, meat pies, you name it, I've never made them before! Let alone making the filling for them or even rolling tart dough from scratch etc.  Just coming back from a trip to Kelowna I had picked some very fresh B.C lapin cherries and was itching to do something with them! 

So with fresh cherries in mind and a little inspiration from Pragati over at Get Fresh with Food, I decided on a chocolate ganache tart with a Pâte Sucrée shell.  Here's my first attempt at them (below).


So not to a bad start! However, I feel that I could have cooked the crust a lot more! I'm so used to the precision of macaron making, that I didn't realize that tart dough has way more flexibility. Cooking longer than the prescribed 10 minutes, while blind baking, is completely fine! Tarts from both my attempts were made with the pâte sucrée crust. Then, filled with a lovely chocolate ganache recipe from Pragati


The next day, I decided to try again using the same recipe and the pate sucree dough.  Attempt number 2 was much better- aesthetically that is. What do you think? 

Pate sucree shell filled with chocolate ganache and topped with
blueberries and freshly picked B.C cherries.
Nicely browned tart shells. Oh, and yes, those are pitted & halved
 cherries you see on the tart!
So fresh & big!
 
Over my self-taught tart making 101 endeavors,  I've learned that there are many many different doughs that can be used! The pâte sucrée is especially brilliant for tarts/flans as it tends to hold its shape well during cooking. This dough also has a high proportion of sugar and needs to be chilled for at least an hour before using.

This recipe can make enough for 9inch flan tin/quiche pan. For both of my attempts I had enough to cover four, 4 inch tart tins with some left over for an extra one or two tarts. You could also use the remaining dough for 'rustic' tarts (pushing dough into muffin tins and leaving some space for the filling.

Pâte Sucrée (makes about 275g or 10 oz)

Ingredients:
  • 150g (1 1/4 cups) All purpose flour
  • pinch of salt
  • 75 g (6 tbsp) diced & chilled butter
  • 25g (1/4 cup) icing sugar (sifted)
  • 2 egg yolks
Part 1: Making the Dough

1. Sift flour and salt together and make a mount on a marble slab, pastry board or cold work surface (take ice cubes & ice the surface ahead of time). 
2. Make a well in the center and put in the chilled & cut butter.
3. Sift icing sugar on top.


4. Place egg yolks on top of the pile.

5. Using on your fingertips and a pecking action, work the butter, yolks and sugar together. The mixture should look like scrambled eggs.

5. As you go along, being to incorporate the rest of the flour.
6. Continue doing this until all the flour has been worked in and you have a dough.
7. Add a bit of egg whites if the pastry becomes too crumbly.
8. Once you have a dough, lightly knead the dough with the heel of your hand pushing the front portion of the dough away from you (1 minute) - this process is known as fresage. You want to have a smooth and pliable dough.
9. Once smooth and pliable, shape the dough into a ball. Flatten slightly, then saran wrap.

10. Chill dough for 1 hour in the fridge before using.
11. If you're using a marble slab, return that to the fridge as well so it will be cold when rolling out the dough.

Part II: Rolling out the dough

To get a nice visual demonstration, click on over to this video on how to roll out your pastry and to line a pastry tin.
Roll out the pastry lightly and evenly in one direction.
Turn the pastry 45 degrees each time to keep an even shape
and thickness. 
Loosely roll the pastry around the rolling pin. If using small
tins, place them all beside each other and roll the pastry round and rolling
pin over the far edge of the tins and towards yourself.
Allow the pastry to drape into the tin. 
Using floured fingers, gently press the pastry into the tin. 
Roll the rolling pin over the top of the tin to cut off any excess dough.
Saran wrap, then chill in fridge for 30 min to allow the pastry to rest.
This will help prevent the pastry from shrinking while baking.


Part III: Blind Baking

After 30 minutes of chilling in the fridge, prick the bottom of the tarts with a fork. Then put down parchment paper and then the baking beans. Baking beans will help weigh down the tart cases and prevent the dough from bubbling up. Bake for 10-15 minutes at 400F (depending on oven). Then, remove paper and beans, baking for another 5-10 minutes. You want them to look golden brown!

Part IV: Making of the chocolate ganache

Now that you have your tart shells, you can finally fill them! For the chocolate filling recipe click on over to Get Fresh with Food's post on chocolate tarts! Below are some pictures from my try at them! 

Delicious 72% Valrhona Araguani dark chocolate with
whipping cream & sugar.
Tart shells filled and ready for the oven.

Part V: Eating!

Allow the tarts to cool in the fridge, then top with desired fruits! The cherry and blueberry topping was perfect for my first experience at making tarts! Raspberries would also make a wonderful combination with the chocolate.


To help guide me through this tart making process I referenced a nifty book that I received as a bridal shower present. It's titled Pastry: The complete art of pastry making by Catherine Atkinson. I found it really helpful for my first time, with lots of pictures and separate sections devoted to doughs, crusts, and various types of tarts and pies.


Tuesday, August 7, 2012

Fulfilling Bowl of Ramen at Kinton Ramen

A few weeks ago in Toronto, I tried out Kinton Ramen on Baldwin Street in Toronto. Now most people probably would not eat a hot bowl of ramen in the middle of 30 degree C weather (with humidity), but I heard so many promising reports about their noodles & soups. My lunch companions were all for it-despite the hot weather!

Kinton Ramen, is owned by the same group that owns GUU (in Vancouver & in Toronto).  We heard that the line-ups can be long, but the ramen is worth the wait. So, we headed down the street to eat some ramen on a hot and humid Friday afternoon hoping for a short wait time! Upon arrival, we were told that the estimated wait time was around 15 minutes - which wasn't bad in comparison to other diners' experiences.  I was pleasantly surprised when the hostess called our name after only 10 minutes of waiting! Not bad at all for a Friday during the lunch rush (~12:15pm). We were ushered inside and were seated at what I think were the best seats in the house-right in front of the kitchen! 

A mere window pane separated me from the simmering soup stocks! From our seats we were able to watch them prep the soup stocks, finish preparations on the pork, cooking of the ramen noodles and the final assembly! What a great seat! 
  
Soup stock boiling away. 
Place setting.


Adding to the soup stock! :) 

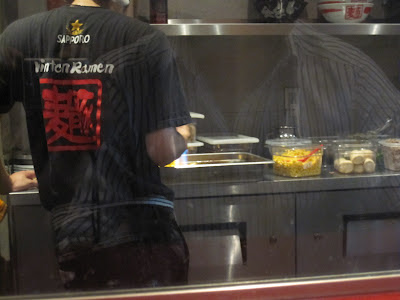
View of the kitchen/prep area. 

Ramen noodles separated into piles
and ready for cooking. 

The view from my seat at the eating bar.
Diners eating at the bar. More seating at the back.
Entire restaurant seats about 40 people. 
Decorations. It's named "Kinton" because it means
"pig". The only meat option available on your
ramen noodles is either lean or fatty pork, and pork shoulder or pork belly. 
Ingredients prepped (corn, egg, pork, green onions) and ready
for their final presentation.
You need a LONG stick to stir that stock! 
Noodle bowls being prepped. They are certainly experts at what they do.
Shoyu Ramen w/ soya sauce, kinton pork belly (fatty), beansprout,
green onion, nori and a seasoned egg ($9.50). 
Miso Ramen with soybean paste, kinton pork belly (fatty), beansprout, corn
and garlic oil ($9.50). This is the one I ordered. 
Shoyu soup but with the lean pork. 
Inside of the seasoned egg. 

The entire bowl of ramen was delicious!

Overall, our lunch meal at Kinton ramen was very enjoyable. The ramen noodles had the perfect amount of texture to them  - al-dente: not too soft, but a small give to each noodle as you bite down. The fatty pork paired nicely with the miso soup that I had ordered as well. Flavourful but not too salty. Kinton Ramen also says that their soup base is made with simmering pork and chicken bones for over 20 hours! After 20 hours, bonito fish and veggies are added. That's why their soup stock has the taste of umami I will certainly return for another bowl on my next trip home to Toronto. 

Kinton Ramen Japanese Ramen Bar
51 Baldwin St. 
Toronto, ON.
(647)  748-8900

Friday, August 3, 2012

Diving into Chocolate with Tasty Tours in T.O.


During my last week in Toronto I had the fantastic opportunity to attend a local Toronto food tour. Now, this wasn't any food tour, but a chocolate tour! It was held by Toronto's own Tasty Tours. They currently have two types of tours, a chocolate one and a sweets tour. 

The one I participated in was held by Audrey Ooi. Audrey is awesome and I'm sure everyone will enjoy talking to her while she leads you on a chocolate tour around the Trinity-Bellwoods area. Our tour started at the beautiful Alimento on King Street West. Audrey started the tour off by talking about where the word "cacao" came from, the origins of chocolate, complete with pictures and some tastings of cacao. 
Big windows inside Alimento brings in lots of sunlight.
64% dark chocolate Peruvian house blend chocolate from Soma on left
Cacao nibs from Soma on right.
Close up of the Cacao nibs. These ones have been roasted.
Inside of Alimento. There's a cheese counter, deli,
and of course a sweet treats display! 
Assorted Biscotti (hazelnut, chocolate etc..)
First chocolate tasting @ Alimento

Gluten free pistachio, chocolate macaroon and
 Toscano Brown chocolate @ Alimento 

mm..more chocolates, dark cherries & wafers
to taste!
This is some very good chocolate! (60% cacao) Hazelnut
roses by Loacker. You can probably find
them at your local Italian store. If you are in Edmonton, find it at
the Italian Center (only a few boxes left). 
Second stop: Delight- Handmade Organic
Fair Trade Chocolate. 

All their handmade chocolates & truffles on display

Since we were on tour, everyone got a taste of
their choice of gelato (also handmade) and a chocolate.
Of course I had to try their chocolate ice cream.
It was very creamy, not too heavy or sweet.
Must be the natural, organic ingredients in their ice cream.  


I tried their chocolate filled with caramel and smoked sea salt.


Caramel is oozing out! I liked the texture of this chocolate,
and the caramel consistency was nice with the hint of smoked sea salt.
 However, I did find that taking small sips of water in between
bites helped with the overall sweetness of the chocolate.


Audrey, from Tasty Tours inside Nadege. 

Chocolate Bars @ Nadege at their Queen St. West location.
Their chocolate are made at their other store on 1099 Yonge St.


4th stop: Sanko- Japanese Convenience Store. 


Here is a Sakura Maccha Latte with cherry blossom by KitKat! Yes, they
make these! Apparently there are only 3 places in the world
(including this store) that managed to source this particular
flavour! Definitely a limited chocolate. Maybe that's why it tasted
even more delicious. :) 

5th & final stop: Chococrepe. 

Front of chococrepe's store showcasing their gelato and sorbet.
Chocolate tour participants listening intently to Audrey. 
Here is Dewey (one of the owners) passionately describing
how Chococrepe came into existence, how they make their crepes,
and where they source their chocolates.
Nice chandelier at the back of Chococrepe. The mirror helps make
the back of the restaurant look larger and brighter.

Beautiful Presentation!
Left to Right Tasting
  • Dark chocolate: tasted like dark dried berries, and dried fruit.
  • Caramelia: creamy, milk chocolate, with hints of caramel.
  • Ivor: waxy white chocolate
I really enjoyed the dark chocolate, but maybe it's because I'm a fan 
of dark chocolate! 
The middle was a small shot of milk chocolate made at their chocolate 
bar. Dewey also explained that you can't heat the chocolate & milk 
too fast or at too high of a temperature otherwise the taste is often
undesirable.  
Last tasting: Super cute mini crepe topped with
a slice of banana, strawberry, milk chocolate and white chocolate sauce. 

I also brought these delicious goodies home. It also helped that
we got a slight discount! Picture rice crispy-like mini balls that
are dipped into chocolate. Yummy! They also shouldn't melt
in the oven. Will let you know how that goes with my macaron making!

Thanks again to Tasty Tours and Audrey for a great chocolate tour of the Trinity-Bellwoods Park area. I'm certain everyone had a great time! I personally really enjoyed this tour! The allotted time of 3 hours was good as everyone had a chance to explore each store, talk to store managers and taste samples! There is definitely some walking involved, but you go at such a leisurely pace that you have no idea that you just walked several blocks (hint: the walk to Nadege is completely worth it! Their almond croissants & macarons are amazing!). The size of each group is not too big as well; with approximately 10 people per group. This is great as you have the opportunity to bring a significant other, a few friends or, like me go alone and meet some new faces! 

For those of you interested in participating in this tour or their sweets tour, head on over to Tasty Tours for more information - http://www.tastytourstoronto.com/

Alimento Fine Food Emporium
522 King St. W. Toronto, ON.

Tel: (416) 362-0123
www.alimento.ca

Delight Chocolate 
805 Queen St. W, Toronto, ON.
www.delightchocolate.ca

Nadege Patisserie
780 Queen St. W, Toronto, ON.
http://www.nadege-patisserie.com/

Sanko Trading Co. 
Japanese Foods & Gifts
730 Queen St. W, Toronto, ON.
Closed Tuesday
www.toronto-sanko.com

chococrepe
620 Queen St. W, Toronto, ON.
Tel: (416) 855-5601
Closed Mondays
http://dine.to/sites/chococrepe/#home