The above picture depicts some beautiful croissants that I not only baked, but made from scratch! So, you are probably thinking this is something I do every once in a while considering my love for macarons and complicated baked goods. However, I must say this picture also represents the very first time I have ever baked croissants - unless you count those Pillsbury ones that we used for the homemade cronut post. Like every great picture there is a backstory and this picture is no exception to that rule.
Back in November 2014, I had the very exciting opportunity to attend the launch of Duchess Bake Shop's cookbook. While Giselle was introducing the cookbook she mentioned how some recipes were easier than others such as the Ginger Cookies and some were more challenging such as the macaron recipes and the croissants. At that moment, the thought occurred to me that I had to bake the Duchess croissants. Several months later, around our dinner table a few friends and I decided that it would be fun to do a croissant bake-off. Yes! A croissant bake-off where each person would choose a different croissant recipe to bake from and then we would time them all to bake-off around the same time for maximum freshness (more on that in the next post). For now, here are some notes and pictures from my experience baking the Duchess croissant.
The first thing to do was to make the starter. So I measured out the yeast and warm water. While that was dissolving, I added in some bread flour and then let it rise. Then, I measured out some butter, sugar and salt and added that directly to the starter.
Next, I placed the starter in an air tight location (I usually set it inside the microwave) so it could grow some more. After about 30-45 minutes, the starter was ready to use! I moved the starter to the mixing bowl, added in the milk and all purpose flour and mixed it at low speed. It should all come together and look like this (below).
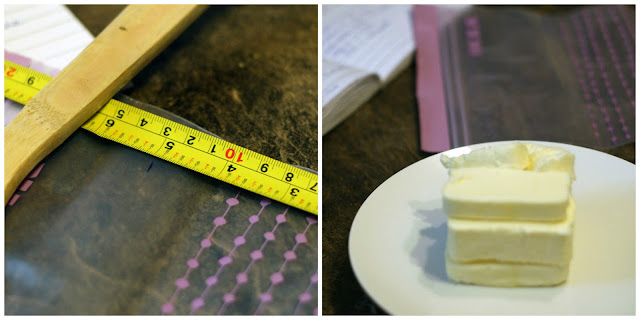
Once the dough was made, I placed it into a oiled bowl and let it rise for about 90 minutes. Meanwhile, the butter plaque had to be made! The butter plaque has to fit nicely into the dough (like a package). This step took a little bit of measuring, hence the measuring tape.
The Duchess recipe book had a great suggestion to create a nicely shaped butter plaque using a resealable plastic bag. I didn't quite have the same dimensions for the bag specified in the recipe but I measured it out to be approximately the right size for the butter plaque. The recipe in the book also has some easy to follow instructions for how to make this.
By the time I finished making the butter plaque and placed it into the fridge to keep cold, the dough had doubled in size and was ready to use. For Christmas, I got Dan a marble rolling pin and it is probably the best kitchen item we have bought! The heavy weight makes rolling the dough out a breeze! Honestly, getting the dough to the size I needed to fit the butter plaque in took no time at all. Dan can attest to this as he had previously used a light wooden rolling pin for the cronuts.
One of the things that was different about this croissant recipe compared to others is cutting the dough in half- instead of folding. With the butter plaque firming in place, I squished the sides of the dough closed in order to keep the butter inside.
Next, came some more rolling, placing the dough back into the fridge (so the butter doesn't melt) and specific folds such as the book fold and the single fold (sort of like folding a letter). The recipe in the Duchess cookbook is very detailed so it was quite easy to follow.
After all that, the dough rested in the fridge for another 40 minutes. By this time, I was getting tired as it was hitting close to 12am (I started this croissant baking later than expected at 8pm on a Friday). However, we had decided to bake off all of our croissants around the same time the next day, so I was determined to finish! This recipe is also a bit different compared to other recipes as there is less proofing time and folds other than the book and single fold.
I rolled out the dough to about my arm's length and then scored triangles out. In order to have the characteristic crescent shape for this style of croissants (not chocolate or almond), you want to cut a small line at the base of each croissant before you roll.
The almost finished product! Here they are! Beautiful raw croissants. Once rolled, they sat overnight in the fridge under saran wrap.
In the morning, I took the tray of croissants out and placed them into the cold oven to continue proofing (approximately 1-2 hours). They should grow a little bigger.
Once we arrived at L & S' house, we quickly whisked together a egg wash made from egg, salt and milk to brush over each croissant and popped my croissants into the oven!
After 18 minutes of baking at 425F in L & S' oven, my croissants were done!
Stay tuned for the next post about the comparisons and results from the croissant bakeoff!


No comments:
Post a Comment