Showing posts with label appetizers. Show all posts

Monday, December 29, 2014

So Gouda! Artichoke Appetizers


Christmas 2014 is over, but the New Year is just around the corner! I made these filled artichoke hearts topped with gouda for Christmas Day appetizers and I am sure they will do well for upcoming New Year events and parties! 

For this post, I teamed up with my friend Michelle from The Tiffin Box and Dairy Farmers of Canada (DFC). The DFC provided me with the ingredients to try out one of their recipes from their Winter Warmth Collection titled "Exotic Artichokes with Gouda". 


I really liked the use of fresh herbs for the recipe. I am admittedly not a fan of parsley but with the combination of the fresh mint and dill, I barely noticed! 


In addition to the fresh herbs, the recipe calls for rice, chopped walnuts, seedless grapes, honey and shredded gouda for the topping. 


After all the ingredients are prepped, toss them together in a bowl. You can also place the filling into an air tight container in the fridge until you are ready to assemble the appetizer. I made these for Christmas dinner so I prepared all the ingredients mid afternoon and had the filling sitting in the fridge. Once guests arrived, I topped the artichoke hearts with the filling. I also added a few more gratings of gouda before serving. 


At first, I did have a little trouble topping the artichoke hearts with the filling as very little could be placed into each one. Then, Dan's Dad came to the rescue and suggested slightly pushing the artichokes hearts in to form a deeper vessel for the filling. This seemed to help a lot! We also attempted to cut down the artichoke heart but this resulted in extra artichoke pieces left over and the vessel falling apart completely. 

Overall, all the ingredients worked well together. I would suggest using less honey as the grapes were already quite sweet. I also used a Korean short grain brown sticky rice since that was all we had in the pantry. I am also thinking that getting artichoke bottoms next time would make the assembling of the appetizer much easier. 

So, head on over to the Dairy Farmers of Canada website to download the recipe and explore other recipes with cheese.  

Then, click on Exotic Artichokes with Gouda for the ingredient list and directions. Come on back to ask me any questions if you need! 

Also, remember to check out Michelle's post on her take on the Mediterranean Ricotta Cheese Fritters.

Disclosure: While Michelle and I were provided with the ingredients for our recipes, we were not compensated monetarily for our posts. 

Tuesday, December 23, 2014

Kimchi Roasted Cauliflower


You have probably been reading about how cauliflower is the "new" vegetable to cook with. Or, maybe it is what all the food websites that Dan and I have been reading are telling us. So, of course we needed to try out a recipe to test this theory of how cauliflower is the 'it' vegetable. 

This recipe is inspired by a recipe from the Thug Kitchen Cookbook. There is no frying of any kind which makes this cauliflower dish truly healthy! By adding in the kimchi, it reminds me of a dish from an exciting restaurant in Edmonton called Tavern 1903 (which recently closed) called KFC - Cauliflower Fried Chicken.


Feel free to adjust the spice level to your preference. The kimchi we used in this recipe was one that we had made with friends about a month ago. 1 head of cauliflower is good for 3 to 4 people.

Ingredients

  • 1 Head of Cauliflower
  • 1/2 cup of Flour
  • 1/2 cup of water
  • 1/2 teaspoon of baking powder
  • 1/2 teaspoon of salt
  • 4 tablespoons of kimchi

Instructions

  1. Preheat oven to 375F. Cut up the cauliflower into finger-length chunks.
  2. Start making the batter by mixing flour into the water as this helps to avoid clumps. Once flour is mixed in, add in the baking powder and salt.
  3. Coat the cauliflower pieces with the batter.
  4. Pour the coated cauliflower onto a baking sheet lined with parchment paper.
  5. Bake for 15 minutes at 375F.  Then, set the oven to broil and bake for another 5-10 minutes, until you have your preferred level of browning.
  6. Take the tray out of the oven and gather the hot cauliflower into a pile. Then, slowly mix and fold the kimchi into the cauliflower pile.
  7. Serve immediately. 
We also ended up grating some pecorino romano onto the dish afterwards and it worked perfectly! A friend of ours also thought sprinkling some furikake and toasted sesame onto the dish would work nicely too.

Let me know what you added to your dish in the comments below. 


Sunday, December 21, 2014

Homemade Candied Cranberries Step by Step


Bowl of homemade candied cranberries that look like ice-frosted berries.

Here are some neat treats to make for others, to serve at gatherings or to bring to potlucks that we have been making. These are essentially "raw" cranberries that have been candied. Think of them being a cranberry center with a crispy sugary shell.

I brought some of these to a work potluck and they were very well received! So, here is the recipe as even those that don't bake can make these creations! 

Ingredients

  • 2 Cups of fresh (never frozen) Cranberries
  • 1 Cup of Water
  • 1 Cup + 1/2 Cup of Sugar
  • 1 teaspoon of lemon zest

Mise-En-Place: A cup of fresh cranberries, a cup of sugar, and a cup of water.
*We bought our fresh, never frozen cranberries from Costco! They had the best looking cranberries around!


Instructions

  1. Create the simple syrup by pouring water and 1 Cup of sugar into small pot. Add lemon zest to pot. This will will help add more dimension to the flavour. Heat mixture until sugar has dissolved into boiling water.
    Pouring a cup of sugar into a small pot.

    Pouring 1 cup of water into the same pot as the sugar.
  2. Let the mixture cool for 10 minutes. Add cranberries to the simple syrup.
    Pouring a cup of cranberries into pot.
  3. Cool the cranberries in the syrup until room temperature. Put cranberries and syrup into air-tight container. Rest in the fridge for at least 8 hours or up to 48 hours (2 days).

    Two cups of fresh cranberries inside a mason jar containing simple syrup.
  4. Strain cranberries out from syrup - this same syrup can be reheated and reused again. Let cranberries dry for about 5 minutes.

    A plate of red cranberries coated in simple syrup.
  5. Put 2-3 tablespoons of sugar into a small dry cup. Placing one cranberry in at a time, roll the cranberry in the dry sugar. If you add too many cranberries at once you'll get clumping.
    A cup with some granular sugar and a single cranberry rolled in the sugar.

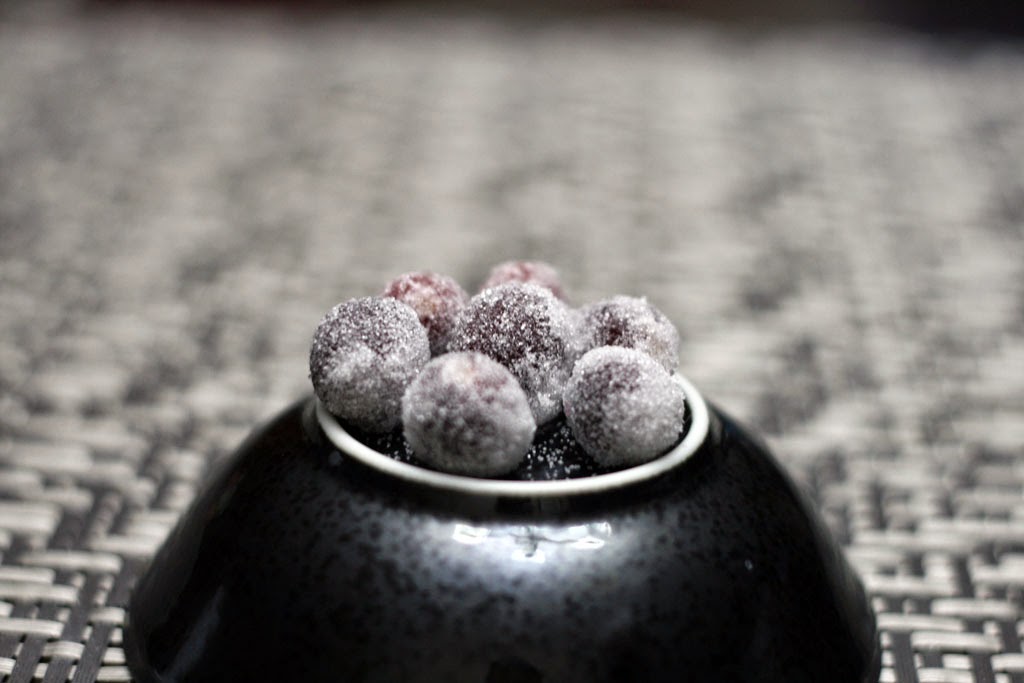
    An inverted bowl displaying seven sugar frosted cranberries.
  6. Keep the candied cranberries in an air-tight container in the fridge. It should keep for a few days in the fridge before getting soft. Alternatively, you can package them off as gifts in an air-tight container.

    A bowl of candied cranberries.
Hope you enjoyed these candied cranberries!


Friday, November 7, 2014

SPUD Delivers in Edmonton & A Brown Sugar Glazed Carrot Recipe


When I was at the Food Bloggers of Canada Conference in Vancouver last month, I met one of the people from SPUD. SPUD is a grocery delivery service which focuses on sustainable and organic produce. When I talked to Julia, the Communications Manager for Vancouver, she mentioned that SPUD Edmonton had just launched so I was more than excited to try it out.


When you sign up for the SPUD service on their website you can pick and choose what types of produce, meats, snacks, dairy, fish and more that you want delivered in your box. Our box featured their Fresh Harvest Box. Once you order your box they let you know which day your box will be delivered. For us, we were told that our SPUD box would be delivered on a Tuesday between 3pm and 9pm. Granted, the time frame is very wide which makes it difficult for someone to be home during that time period. Thankfully, you are able to put in special instructions and/or indicate a safe place for them to deliver your box.

We were super excited to open our box when we received it. All of the produce including the veggies and fruits looked fantastic and fresh. Care was even taken to ensure that the tomatoes would not get crushed as they were placed into a paper bag. There is also a divider in the box to help keep produce in place.

If you want to try SPUD out they have a great discount where if you buy $60 or more you will get $40 off your first order before November 15, 2014! Just use my special code CREDM-ZZZLIL or click here.

SPUD is also in other cities! So if you are in other cities in Canada such as Calgary, Vancouver & area or Victoria to Nanaimo, you too can take advantage of their services. They are also in San Francisco & Bay Area and Los Angeles & Orange County in the States. 

With the great produce that we got, I decided to use the carrots in a dish to highlight how fresh they were. 

Brown Sugar Glazed Carrots Recipe

Ingredients:
  • 2 lbs of carrots
  • 1 cup of water
  • 1 tablespoon of butter
  • 1-2 tablespoons of brown sugar
  • pinch of salt
Directions:


  1. Wash and peel the carrots.
  2. Cut the carrots with a sharp knife into even pieces. This will help them cook evenly.
  3. In a large pot add 1 cup of water, butter, brown sugar, a pinch of salt and the cut carrots. Turn the temperature up to high. Once the water mixture begins to boil, stir the carrots and turn down the temperature to a simmer. Place the lid on the pot for 6-7 minutes.
  4. Using a flat spatula gently stir the carrots around until they are soft enough to eat. Serve & enjoy!


Monday, November 11, 2013

Homemade Step By Step Guacamole


Homemade Guacamole is probably one of the tastiest and easiest items to make either as an appetizer with chips, or when you make home made tortillas such as my last post. To start, you will definitely need about 3-4 ripe avocados. Lately, we have been purchasing an entire bag of avocados from Superstore or Costco (depending on the price).


Ingredients:

  • 2-3 ripe avocados
  • 1 lemon juiced
  • 1/2 teaspoon coarse salt
  • ground fresh pepper 
  • 2-3 cloves minced garlic
Directions:

1. Gather all ingredients together. Cut avocados in half. Using a spoon, scoop out the avocado flesh into a large bowl or into the bowl of the food processor. Juice the lemon.
Note: I often scrape away the rind of the lemon first and freeze the rind for other baked goodies.

2. Pour the lemon juice over the avocado flesh, place in the garlic cloves, add salt & pepper to taste. If mixing by hand, mince the garlic cloves into smaller pieces. 


3. Process the guacamole or using a spoon mash the items until it reaches your desired consistency. I tend to leave chunks of avocado for further texture. You can also add in cayenne pepper for an extra kick. Let the guacamole sit at room temperature and serve. Enjoy!


This Guacamole will also go well with corn tortillas! Recipe here

What do you like adding to your guacamole? Or do you do anything differently with your guacamole? Add a comment below! 

Thursday, December 13, 2012

Tasty and Healthy Seaweed Salad

As of late I have been incredibly obsessed with the tiny dish of seaweed salad that is often served as a 'starter dish' in Korean restaurants. Also known as Miyeok Muchim in Korean, I find that I often ask for a refill (or two) of this dish.  I love the salt and vinegar taste on the first bite, mixed with some sesame oil and a hint of sweetness that makes this dish taste so good! An added benefit to seaweed salad is that it is super healthy! If you eat it in moderation, you won't go too over on the calorie bank! 

So, in order to prevent myself from continually ordering refills of miyeok muchim in a Korean restaurant, I decided to make my own. There aren't too many ingredients and you can adjust it to your taste.


L to R (back row): untoasted sesame seeds, rice wine vinegar, sesame oil, dried seaweed
(front row): sugar, finely diced garlic, salt
Ingredients

  • 1 cup of dried seaweed
  • 2-3 cloves of garlic (finely diced)
  • 2-3 tsp sesame oil (to taste)
  • 1-2 tbsp rice vinegar (add more as needed!)
  • 1 tsp salt
  • 1 tbsp sugar
  • roasted white sesame seeds
Directions
1. Measure out 1 cup of dried seaweed. It looks like dried tea leaves at first! Soak the dried seaweed in a bowl of water for approximately 10 minutes. You will see the seaweed expand! 
2. Rinse the expanded seaweed in warm water. Then in cold water to bring it back to a nice green colour. 

3. Drain the water out of the seaweed by squeezing it gently. I also placed it into my salad spinner to get some more of the water out. 

4. Place your seaweed in a large bowl.

5. Finely chop 2-3 cloves of garlic. If you want your salad to be have intense garlic flavours (which is what I prefer) than chop up 3 cloves. Having a super sharp knife such as our recently purchased Yoshikane Santoku from Knifewear can make all the difference! 
6. In a separate bowl put in your chopped garlic, then the sesame oil, rice vinegar, salt, and sugar. Mix well and taste. Adjust the flavours as needed; adding more rice vinegar or sesame oil to your tastes. Sesame oil also helps to remove the briny or "fishy" taste that the seaweed sometime has.

7. Pour mixture over the seaweed. To get an even mixing, mix by hand. 
8. The seaweed salad is best eaten or served cold.

9. Sprinkle some roasted white sesame seeds on top of the salad before serving.You can purchase white sesame already roasted or to make your own toast half a cup of white sesame in the toaster oven for a few minutes on low. Watch it careful as it can burn easily.

10.   Enjoy! 

11. You can also add finely sliced cucumber, carrots, daikon, or even add a dash of red chili powder to make it spicy!

*Buying Notes* 
  • You can purchase rice wine vinegar at any Chinese (T & T), Korean or Japanese store. 
  • To find the dried seaweed I went to a Korean store. There are a few Korean stores in Edmonton that I frequent. Two of them are in Millwoods- Korean Central Market at 9271 34 Ave NW and Korean Japanese Food and Wares at 3116 Parsons Road NW. In the Donnan/Bonnie Doon area there is L & K Oriental Foods and Imports at 7743 85 St NW.