Tuesday, July 9, 2013

Step by Step Easy Hummus Dip

Drained chickpeas, lemon juice, lemon zest, garlic cloves, salt & pepper, olive oil in a food processor for hummus (humus).
Easy Hummus Dip with drained chickpeas, lemon juice, lemon zest,
fresh garlic, tahini, olive oil, salt & pepper.


Now that the summer season has finally arrived here in Alberta, like many of you, I've found myself attending various work functions, BBQs and visits with friends. One of my favourite things to bring is a flavourful, yet easy to made hummus dip. I've found that this hummus dip works great when you're trying to come up with meal ideas for a potluck or work function. 


Home made hummus (humus) dip processed in food processor.
Creamy hummus dip

Hummus Ingredients

  • 1 can of chick peas drained and rinsed
  • 1/4 cup of tahini (tahini paste)
  • Juice of 1 lemon & zest
  • 2 cloves of garlic
  • 2 tbsp of olive oil
  • sea salt to taste
  • freshly ground pepper to taste
kitchen equipment needed: food processor or blender, strainer

Directions

  1. Drain and rinse a can of chickpeas and then place into the food processor.
  2. Zest the lemon, then set aside.
  3. Juice the lemon.
  4. Add the tahini, lemon zest, lemon juice, garlic cloves, olive oil, salt & pepper (to taste) to the chickpeas in the food processor.
  5. Puree until it is smooth. It should look creamy.
  6. Add more olive oil, salt & pepper as needed.
This hummus dip makes about 2 cups. Typically, I bring one cup to the function I'm attending and save the other cup at home in the fridge.

This hummus dip is super creamy and has a decent garlic flavour balanced with the lemon along with a hint of tahini. Tastes great along side home made pita chips (brushing olive oil on pita bread cut into wedges & baked) or if in a rush grab a bag of sea salt chips from the local store. Feel free to adjust the lemon, tahini or garlic amounts to your tastes.

Lastly, if you end up with leftover hummus dip use it to make baked hummus chicken! I will certainly blog about this the next time I make it, as it was a last minute inspiration (see below). Not only does baked hummus chicken tastes similar to baked chicken made with panko or bread crumbs, but it's gluten free! Pat dry the chicken, then slather on the hummus. Bake the hummus encrusted chicken at 375F for 30 minutes or until the juices run clear.

Hummus (humus) crusted chicken baked in the oven along side risotto and asparagus
Gluten free oven roasted hummus crusted chicken

Thursday, July 4, 2013

Smashing Good Time at Smashburger - Sherwood Park


Smashburger opened July 3, 2013 in Sherwood Park
On July 2, we were invited to preview Smashburger in Sherwood Park before it opened for the public on July 3. Smashburger is originally from Denver, and this Smashburger location in Sherwood Park is Smashburger's third opening in Alberta; with its first two in Calgary. While Dan & I were waiting for our friends to arrive, we ended up meeting Scott Crane (President) and Greg Creighton (COO) which was pretty neat to say the least. They mentioned that they had recently opened a Smashburger in Kuwait, and were currently in town for the opening in Sherwood Park.

So, you are probably wondering, what makes Smashburger different then others? First off, Smashburger wants to give you a "better burger" experience. All of their burgers are made fresh from 100 per cent never frozen Certified Angus Beef smashed on a 400 degree flat grill. For the restaurants in Alberta, they hope to have a menu that is regional - such as having an Edmonton Smashburger, Edmonton Smashchicken and Saskatoon Berry shakes.


There is the option of creating your own burger, but most of the signature choices or classics had what we wanted. We ended up ordering 4 burgers and almost all options of sides possible. They weren't ready with the fried pickles yet; so maybe sometime in the future you will see them at this location.

In order to truly test the flavours of each burger, we split each burger up. Of the burgers we ordered, I enjoyed the Classic Smash and the Avocado Club. The meat in both retained its juice and went well with the rest of the condiments - ketchup, lettuce, tomatoes etc.. on the Classic Smash and avocado, bacon, tomato and ranch dressing on the Avocado Club.
Avocado Club: fresh avocado, applewood-smoked bacon, lettuce, tomato, ranch
dressing & mayo on a multi-grain bun (reg size- $6.99). Veggie frites on the side ($3.99)
Classic Smash - cheese, smash sauce, ketchup, lettuce, tomato, 
pickles, onions all on an egg bun ($5.99) with smashfries ($2.49)


While the meat is certainly prepared the same way on each burger, the meat on the BBQ, Bacon & Cheddar seemed to be a tad dry and comparatively more salty in comparison to the other two burgers. I'm thinking that the dryness and saltiness likely came from the combination of the cheddar, bacon, and haystack onions. There were also samples of Smashburger's delectable shakes going around so those went quite nicely with the burgers. 
BBQ, Bacon & Cheddar: BBQ sauce, applewood smoked bacon, cheddar and
haystack onions on an egg bun ($6.99) with sweet potato fries ($2.99).
Last but not least was Dan's Spicy Baja burger. Definitely packed a punch for me. However, Dan felt that it was the perfect burger for him: juicy, good balance of guacomole to spice content and flavourful.
The spicy one- Spicy Baja - fresh JalapeƱos, guacomole, pepper jack, lettuce,
tomato, onion, chipotle mayo on a spicy chipotle bun ($6.99) with smashfries ($2.49). 

Now for the sides. The winner of the night at our table was most definitely the sweet potato fries (pictured above with the BBQ, Bacon & Cheddar sandwich). Perfect crunch, not too much oil or salt. It also stayed crispy while we dined. The next favourite was the classic smashfries. Like most people have mentioned, the addition of rosemary, olive oil and garlic are a perfect combination. We also had the poutine. Like all classic poutines there was a good balance of cheese curds to gravy. Unfortunately, the gravy and the salt on the fries, made this particular side rather salty.


Canadian themed pictures up on the wall at Smashburger
Last but not least, were the delicious shakes. We didn't get a chance to try their full sized shakes, but of the flavours we tried - strawberry, vanilla and saskatoon berry we all enjoyed the strawberry and saskatoon berry shake. When asked what kind of ice cream they are made with, the owner said that he decided to use Nestle (the sister company of Haagen-Dazs). The Saskatoon Berry Milkshake was really tasty and was made with real saskatoon berries which made it a bit difficult to drink with the regular-sized straw we were provided (we got around this by simply drinking the shake from the cup).

Overall, everyone had a good meal at Smashburger in Sherwood Park. I would definitely go back if I was in the area. Hopefully there will be plans for a Smashburger in Edmonton in the future as that would make it way more accessible the next time I'm craving a fresh burger.

If you're wanting a chance to try out Smashburger you can find it at #535 5000 Emerald Drive, Sherwood Park AB. Truthfully, finding it at first can be tricky. Since I'm a visual person, this Smashburger location is in a small food complex across from the Winners and Bulk Barn.  

You can also a look at these other reviews from fellow food bloggers to see what they thought of their Smashburger experience:

What Would Argenplath Pay
Baconhound 
Little Miss Andrea
Mr. Moo's Adventures

Smashburger 
535-5000 Emerald Drive
Sherwood Park, AB
menu: http://smashburger.com/menu/edmonton/


Smashburger on Urbanspoon

Tuesday, July 2, 2013

My Homemade Thin Pizza Crust Recipe - Step by Step

Homemade pesto, bocconcini, tomatoes and mortadella on a thin pizza crust. 
I've had lots of questions about our homemade pizzas. Making homemade pizzas are much easier then you think. Plus, the benefits are amazing! The pizza recipe that we use yields a nice thin pizza crust and is crispy. As for the base of the pizza I use either a red tomato sauce base, a pesto, or a simple fried garlic and olive oil. As for toppings anything is possible! Some days my topping inspirations come from whatever pizza-like ingredients that are in the fridge; which means some sort of cheese, cold cuts, and a veggie or two. Other days, we actually have leftovers on our pizzas! I know, this sounds interesting but having stir-frys, barbecued pork, steak etc.. from last night's dinner and topping it with cheese is completely fine in my books! When we have guests over, we tend to make pizzas with traditional ingredients.

What are some pizza toppings that you enjoy on your pizzas? 


Thin Crust Pizza Dough (makes 2 medium sized thin crust pizzas)

Preparation Time: 1.5 to 2 hours

Ingredients
  • 1  1/4 Cups of lukewarm water
  • 1  1/2 Teaspoons of fast rising yeast
  • 1 Tablespoon of honey
  • 2  3/4 Cups of all purpose flour
  • 1 Teaspoon of salt
  • 2 Teaspoons olive oil
  • Corn meal to cover baking surface
Directions:
  1. In a bowl, combine water and honey evenly then stir in yeast. Let stand until frothy, for about 5 minutes. (I place mine in the microwave as it is free from drafts). 
  2. In a different bowl, mix the flour, salt and oil. Stir with a wooden spoon. Add the yeast mixture and mix until a soft ball is obtained. Remove the dough from the bowl and knead for a few minutes while flouring to avoid sticking to work surface.
  3. Place the dough into a lightly oiled bowl and cover with a clean cloth. Let the dough rise for about 1 hour in a slightly warm area, away from drafts.
  4. Divide the pizza dough into two equal parts to make 2 pizzas.
  5. You can use the dough immediately or lightly oil before storing in a plastic bag. It can be refrigerated up to 12 hours or frozen. 
  6. Preheat your oven to 240C to 260C degrees (460F - 500F)
  7. You don't need to pre-bake your dough. Stretch and roll out the dough to however thick or thin you like. 
  8. Sprinkle corn meal on a sheet of parchment paper large enough for your pizza. 
  9. Place your stretched out pizza dough on top of the corn meal (see notes)
  10. Add your preferred base sauce (pesto, garlic oil, etc..) and the pizza toppings.
  11. Bake the pizza (which is sitting on the parchment paper) at the lowest rack on a tray or on a pizza stone for around 15-20 minutes or until your crust is lightly browned. 
Notes: 
  • To activate yeast, the temperature of the water and the honey is important. The temperature must be between 41C and 46C degrees (105F and 115F degrees), which means that the water must be heated a little. The liquids should not be too hot as this will kill the yeast and not too cold, as the dough will not rise.
  • Corn meal prevents the pizza crust from sticking to the tray and turning the dough soggy. 
  • I've found that using parchment paper makes it easier to transfer the pizza in and out of the oven. Less messy and sticky. 
Pictures of various pizza toppings that I've tried at home pictured below. Some of these were made with fellow food friends. 
Smoked Salmon, capers and arugala. For this pizza I find that placing the smoked salmon  & capers
after making is best. Squeeze some lemon juice on before serving. 

Artichoke, arugala, tomatoes and mozzarella. 
Tomato sauce based pizza with mozzarella, sopressata, mushrooms, garlic and chili flakes

Quebec cheese, black olives, anchovies, hot oil and capers
garlic olive oil base with bocconcini, roasted red peppers, artichokes, pancetta and pecorino
Dessert pizza: bananas & home-made nutella

There are so many more toppings you can have on your pizza! Have fun trying out classic and new pizzas.

Thursday, June 13, 2013

Saffron & Cardamom Macarons - New Territory in Macarons (Part II)


These beautiful saffron cardamom macarons were made a few weeks ago with Michelle from The Tiffin Box. Our first flavour was the Rooh Afza Macaron, this post is the continuation of our experimenting with Indian inspired macarons. Michelle also wrote a post about her experiences making these macarons together. 

Saffron on its own is pretty flavourless, so we decided to incorporate the saffron threads into the buttercream given their brilliant colour. The cardamom flavour came from ground up cardamom pods which were also mixed into the buttercream. 

These saffron and cardamom macarons together with the rooh afza macarons are one of the most fun and unique macaron flavours that I have made so far. As you bite into these macarons you get the initial hint of saffron followed by the warm scent of cardamom. These macarons would certainly pair well with some chai. How would you eat these saffron and cardamom macarons?    


Ingredients for the Macaron Shells:

  • 100g of Aged Egg Whites (2-3 days in airtight container at room temperature)
  • 225g of Powdered Sugar (also known as icing sugar)
  • 125g of Almond Meal
  • 5g of Dehydrated Egg White Powder (also known as albumen)
  • 28g of Granulated Sugar

French Meringue Method for Macaron Shells:

  1. Measure all ingredients with a scale.
  2. Process almond meal and icing sugar in the food processor.
  3. Sift the blended almond meal and powdered sugar through a fine mesh.
  4. Start beating egg whites at low speed (2 on my Kitchen Aid).
  5. When egg whites are foamy (mousse-like) add in the dehydrated egg white powder (albumen) and granulated sugar mixture.
  6. Put in two drops of yellow gel food colouring (Wilton Golden Yellow). Don't be afraid to make the colour more intense as the colour of the shells will lighten in the oven.
  7. Increase speed on Kitchen Aid to 4. Beat egg whites until "soft peaks" form. Do a check by stopping the mixer to check the firmness of the peak. If a peak stays up, then you are done. Ensure that they are not too stiff or foamy since that means you have gone too far! You have now made the "meringue".
    Soft Peak is also called the bird's beak - doesn't it look like one?
  8. Slowly add the blended almond meal-powdered sugar mixture 2 tablespoons at a time to the meringue you have created.
  9. Mix with a spatula in a clockwise direction. Add in two tablespoons of the almond meal mixture (you will be splitting the almond mixture up into 6 parts) while mixing in a clockwise direction:
    • 1st part= 16 turns
    • 2nd part = 11 turns
    • 3rd part = 14 turns
    • 4th part = 11 turns
    • 5th part = 11 turns
    • 6th part = 23 turns. 
    (Take a look at this video Chef Nini's for a more detailed visual.)
  10. Once the mixture feels and looks like magma (flows slowly) transfer the mixture to a piping bag.
  11. Pipe out small circles. Try piping straight down and then do a quick circular movement to the right to finish piping one shell.
    Macaron shells resting on a sheet waiting for a skin to form.
    Macaron shells resting until a skin forms.
  12. Pipe approximately 30 shells on each tray. Before piping the next sheet, firmly rap tray on floor or counter to get rid of any air bubbles inside the shells. This is called tamping. 
  13. Use a toothpick to pop the air bubbles from the shells (this part is essential as you may end up with volcano macarons instead of smooth macaron shells).
  14. Let macarons sit for at least 30-45 minutes until a skin forms on the macaron and it is dry to the touch (Resting is an important step from my experimenting).
  15. Preheat oven to 250-295 degrees Fahrenheit.

    If baking at 295F put one tray in the oven and bake for 8 minutes, then rotate tray (by now the feet should have formed) and bake for another 11 minutes.

    If baking at 250F bake the shells for 20-30 minutes before rotating the pan and baking for another 10 minutes. This allows for the shells to rise slowly enough to form a firm crust and the sought after pied (feet)
  16. Take out of oven, allow macarons to cool.
  17. Peel from silpat/silicon mat, and get ready to fill with your buttercream.
Note: 

  • Everyone's oven is different! As mentioned in my previous macaron posts, I highly encourage you to experiment, bake test batches and take notes. Even creating a table in your notes to chart is helpful!
  • Each row that I pipe my macaron shells is offset from the other so that I pipe approximately 25-30 shells per sheet.

    Pairs of baked macaron shells on a baking sheet that are matched according to size
    Baked macaron shells that have been paired

Saffron and Cardamom Buttercream

Small bowl with Saffron Threads
Saffron threads


Ingredients for Saffron Cardamom Buttercream:

  • 80g Caster sugar (superfine sugar)
  • 25g Water
  • 1 Whole egg (~60g)
  • 1 Egg yolk
  • 160g Soft butter (cut into cubes)
  • A pinch of saffron threads
  • 5 Cardamom Pods
two small bowls, one containing ground cardamom, the other containing saffron threads
Ground Cardamom on left and Saffron threads on right

Directions for Saffron Cardamom Buttercream:


  1. Peel and discard the shells off the cardamom pods, then grind the seeds (I used a Magic Bullet).
  2. Bring sugar and water to a boil in a small pot.
  3. Heat the sugar to 250F(120C). As it boils clean the sides of the pan with a damp pastry brush. Try not to continually mix the solution. Allow the mixture to heat on its own.
  4. In another bowl or the bowl of your Kitchen Aid whisk the eggs. Once the egg yolks lightens in colour turn off the mixer. 
    Bowl of Whisked Eggs
    Whisked Eggs

  5. While the sugar mixture is heating add the saffron threads to the egg mixture, try to keep it near the side of the bowl as you will need to pour the hot sugar mixture over it.
    Threads of Saffron on top of whisked eggs in a mixing bowl.
    Saffron threads with the colour already seeping out.
  6. Once the hot sugar mixture reaches 250F pour immediately into the whisking egg mixture over the saffron and then immediately turn on the mixer to begin whisking high speed (8 on the KitchenAid).
  7. Continue whisking until the mixture has cooled down completely. It will start to look like a meringue and be glossy.
    Picture of glossy meringue dripping from a whisk.
    Glossy meringue for buttercream
  8. Meanwhile in a separate bowl, cream then whisk the butter until it has thickened.
  9. Once the egg mixture-meringue has cooled (approx. 10-15 minutes), slowly whisk in the butter.
  10. Continue whisking until the buttercream is smooth. It may curdle slightly but this is okay. Keep whisking and the butter cream will come back together.
  11. Add the ground cardamom into the buttercream and whisk until combined. 
    Saffron and Cardamom buttercream.
    Saffron and Cardamom buttercream
  12. Immediately transfer buttercream into a piping bag fitted with a nozzle.
  13. Match each shell to a pair, before piping a small mound of buttercream onto each half shell.
  14. Top with the matching shell to finish the macaron.
    Rows of macaron shells with piped buttercream
    Saffron and Cardamom buttercream sandwiched between macaron shells

Notes:

Saffron is very expensive so a little goes a long way, especially if you're using it just for colour. In our case, we were experimenting so the amount of saffron threads you use in the buttercream is up to you.  

Plate of Saffron Cardamom Macarons arranged in groups of three

Pictures of  Indian Inspired Macarons

Here are some fun pictures of both the Rooh Afza Macarons and the Saffron Cardamom Macarons on a cake pedestal.


Tuesday, June 4, 2013

Rooh Afza Macarons - New Territory in Macarons (Part I)

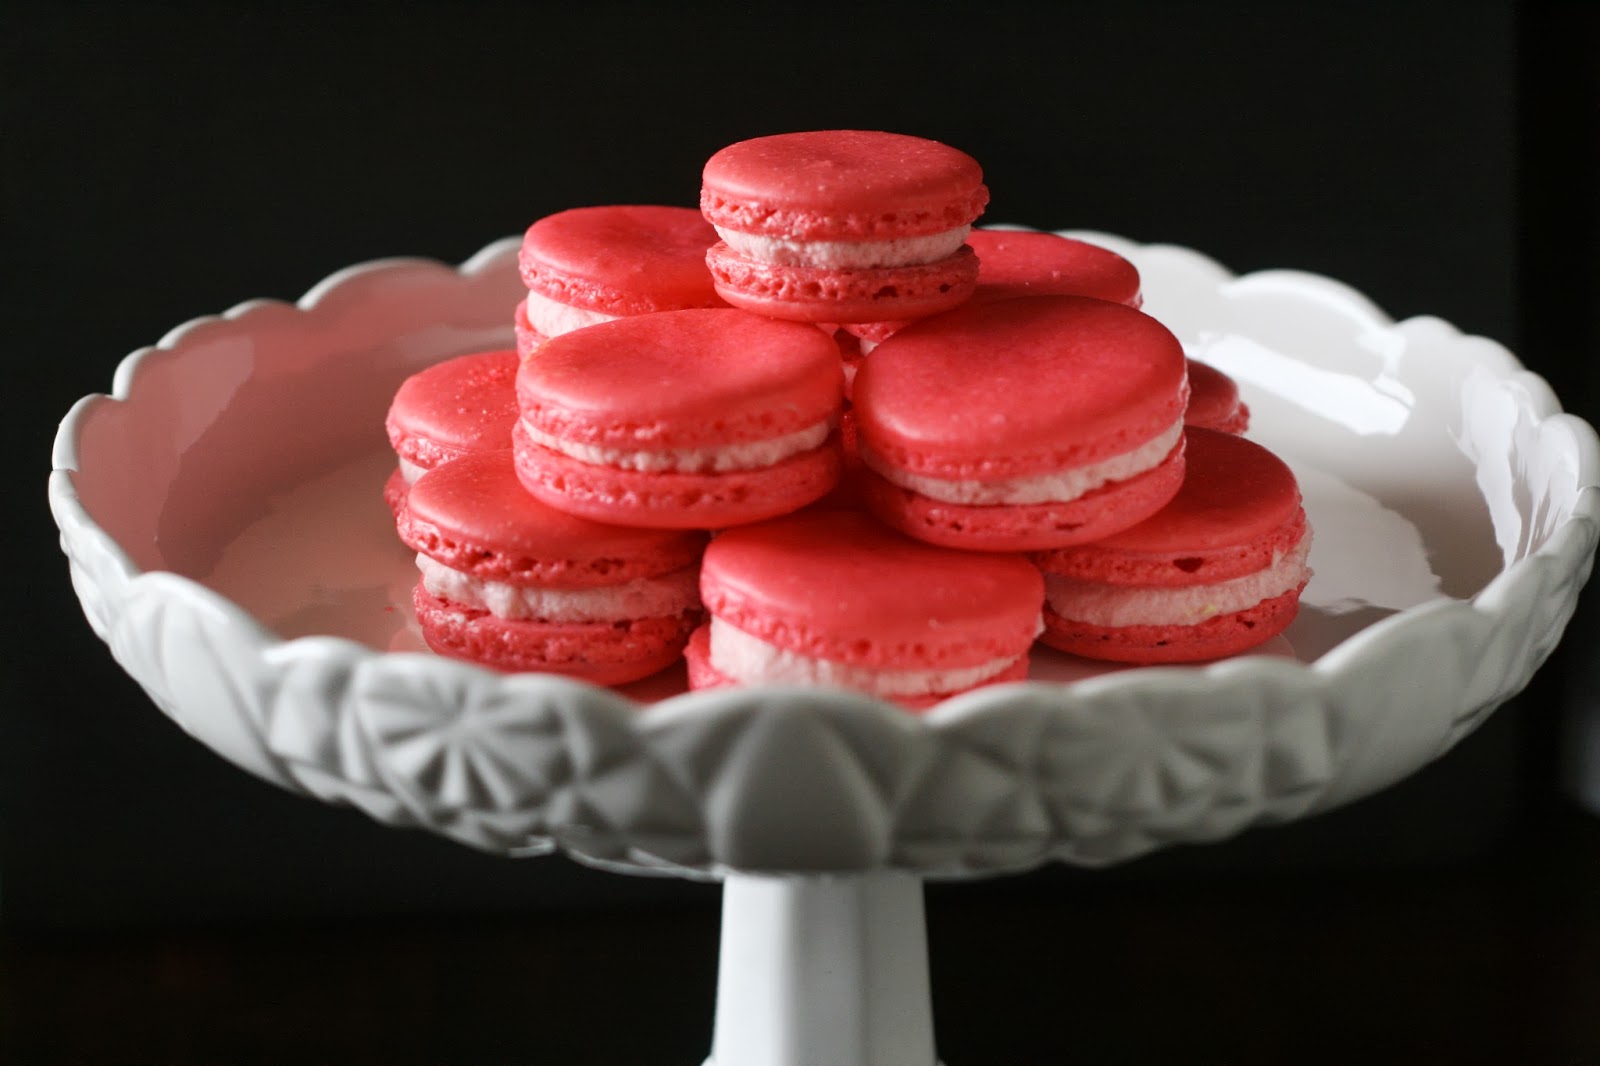
Bright pink rooh afza macarons ready to eat!
A few weeks ago Michelle from The Tiffin Box and I decided to play around with some different flavours and make some Indian inspired macarons. The first macaron flavour to experiment with was Rooh Afza (also spelled as Roohafza). 


This is what the bottle of Rooh Afza (Roohafza) looks like.
You can likely find Rooh Afza at an Indian grocery store. 
Rooh Afza is a non-alcoholic syrup made with fruits, herbs, flowers, roots and vegetable extracts. It's most prominent flavour is the rose flower, followed by the taste of everything else that is in the syrup. A few tablespoons of Rooh Afza mixed with water is a refreshing Indian drink. The way the rooh afza syrup is used is similar to that of Ribena - a concentrate blackcurrent drink. We incorporated the Rooh Afza flavouring into the buttercream. After these Rooh Afza macarons rested in the fridge for two days, they tasted just like you were having a sip of Rooh Afza on a hot summery day.

One thing to note, 3 tbsp of Rooh  Afza may have been a tad much, as after two days of resting the macarons were slightly on the sweet side (for my tastes anyways). It may be best to cut back on the Rooh Afza as the buttercream and shell already contribute to the sweetness content.

Rooh Afza macaron shells
Ingredients for the Macaron Shells:

  • 100g of Aged Egg Whites (2-3 days in airtight container at room temperature)
  • 225g of Powdered Sugar (also known as icing sugar)
  • 125g of Almond Meal
  • 5g of Dehydrated Egg White Powder (also known as albumen)
  • 28g of Granulated Sugar
French Meringue Method for Macaron Shells:
  1. Measure all ingredients with a scale.
  2. Process almond meal and icing sugar in the food processor.
  3. Sift the blended almond meal and powdered sugar through a fine mesh.
  4. Start beating egg whites at low speed (2 on my Kitchen Aid).
  5. When egg whites are foamy (mousse-like) add in the dehydrated egg white powder (albumen) and granulated sugar mixture.
  6. Put in two drops of pink gel food colouring to match the bright pink Rooh Afza colour (Wilton Christmas Red). Don't be afraid to make the macarons a shade darker as the colour will lighten in the oven.
  7. Increase speed on Kitchen Aid to 4. Beat egg whites until "soft peaks" form. Do a check by stopping the mixer to check the firmness of the peak. If a peak stays up, then you are done. Ensure that they are not too stiff or foamy since that means you have gone too far! You have now made the "meringue".
  8. Slowly add the blended almond meal-powdered sugar mixture 2 tablespoons at a time to the meringue you have created.
  9. Mix with a spatula in a clockwise direction. Add in two tablespoons of the almond meal mixture (you will be splitting the almond mixture up into 6 parts) while mixing in a clockwise direction:
    • 1st part= 16 turns
    • 2nd part = 11 turns
    • 3rd part = 14 turns
    • 4th part = 11 turns
    • 5th part = 11 turns
    • 6th part = 23 turns. 
    (Take a look at this video Chef Nini's for a more detailed visual.)
  10. Once the mixture feels and looks like magma (flows slowly) transfer the mixture to a piping bag.
  11. Pipe out small circles. Try piping straight down and then do a quick circular movement to the right to finish piping one shell.
  12. Pipe approximately 30 shells on each tray. Before piping the next sheet, firmly rap tray on floor or counter to get rid of any air bubbles inside the shells. This is called tamping. 
  13. Use a toothpick to pop the air bubbles from the shells (this part is essential as you may end up with volcano macarons instead of smooth macaron shells).
  14. Let macarons sit for at least 30-45 minutes until a skin forms on the macaron and it is dry to the touch (Resting is an important step from my experimenting).
  15. Preheat oven to 250-295 degrees Fahrenheit.

    If baking at 295F put one tray in the oven and bake for 8 minutes, then rotate tray (by now the feet should have formed) and bake for another 11 minutes.

    If baking at 250F bake the shells for 20-30 minutes before rotating the pan and baking for another 10 minutes. This allows for the shells to rise slowly enough to form a firm crust and the sought after pied (feet)
  16. Take out of oven, allow macarons to cool.
  17. Peel from silpat/silicon mat, and get ready to fill with your buttercream.
Note: Everyone's oven is different! As mentioned in my previous macaron posts, I highly encourage you to experiment, bake test batches and take notes. Even creating a table in your notes to chart is helpful!

Rooh Afza Buttercream

Ingredients:
  • 80g Caster sugar (superfine sugar)
  • 25g Water
  • 1 Whole egg (~60g)
  • 1 Egg yolk
  • 160g Soft butter (cut into cubes)
  • 3 Tbsp Rooh Afza
Directions:

  1. Bring sugar and water to a boil in a small pot.
  2. Heat the sugar to 250F(120C). As it boils clean the sides of the pan with a damp pastry brush. Try not to continually mix the solution. Allow the mixture to heat on its own.
  3. In another bowl or the bowl of your Kitchen Aid whisk the eggs and egg yolks until it lightens in colour.
  4. Once the hot sugar mixture reaches 250F pour immediately into the whisking egg mixture. Turn down the whisking speed temporarily to help prevent hot sugar threads from flying everywhere. It is important to pour the hot sugar mixture in quickly and then increase to a higher whisking speed. 
  5. Continue whisking until the mixture has cooled down completely. It will start to look like a meringue and be glossy. 
  6. Meanwhile, cream then whisk the butter until it has thickened.
  7. Once the egg mixture-meringue has cooled (approx. 10-15 minutes), slowly whisk in the butter.
  8. Continue whisking until the buttercream is smooth. It may curdle slightly but this is okay. Keep whisking and the butter cream will come back together.
  9. Add Rooh Afza by the tablespoon into the buttercream and whisk until smooth (3 Tbsps were used for this recipe, but even 2 Tbsps may be enough. Adjust to your tastes.)
  10. Immediately transfer buttercream into a piping bag fitted with a nozzle.
  11. Match each shell to a pair, before piping a small mound of buttercream onto each half shell.
  12. Top with the matching shell to finish the macaron.
Rooh Afza buttercream (with 3 Tbsps. of rooh afza)
Macaron shells all matched. Rooh Afza buttercream piped on top. 
Finished Rooh Afza Macarons
Once you are done making your Rooh Afza macarons, resist the temptation to eat them! Macarons need to rest in the fridge in a covered container for 2 days before they can be eaten. This way they are at their optimal flavour and texture. As you bite into a macaron, there should be the ever so slight crunch followed by a chewy texture. The buttercream will have done its work and softened the shells over the two days they are in the fridge. 

Take the macarons out of the fridge two hours before eating. If you are making an entire batch of macarons for a special event or can't finish an entire batch by yourself freeze you macarons in a covered container. Prior to eating defrost in a covered container for 2-3 hours in room temperature.

Enjoy!