Showing posts with label macarons. Show all posts

Thursday, April 23, 2015

Macawrongs - When Macaron Baking Doesn't Go Right


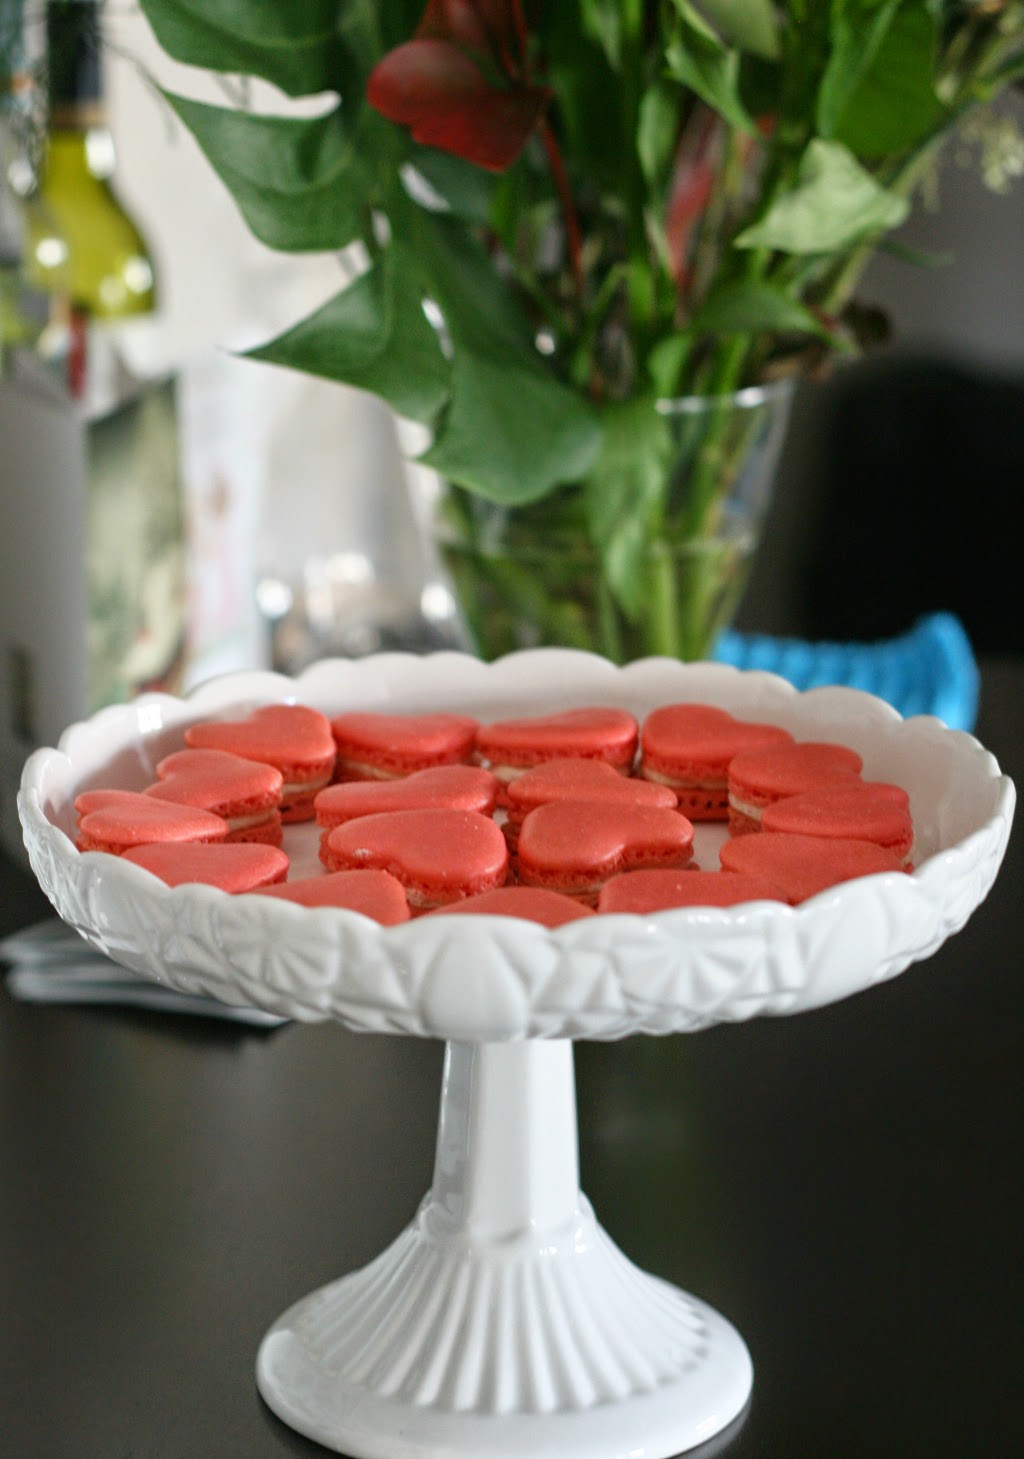
Does the above picture ever look like some of the macarons that come out of your oven? Over the past couple of years many a "macawrong" has come out of my oven! It definitely has been upsetting when I crack open the oven and instead of beautiful smooth macarons with lovely feet (the ruffled edges on a macaron shell) I see a pan of these shells there. In fact, just this week I experienced a batch of macawrongs myself.


The purpose of this post is to continue to encourage you all to keep baking those macarons. Yes, they can be finicky despite all the work we put into them. Let's do some digging into why these macarons look like this. My hubby Dan, an engineer by trade, who has seen me through this journey of macaron making will also help dissect what likely happened in these macawrongs. 

In the macaron shell above, there appears to be a nice feet or pied (french for the ruffled edge). However, the top of the macron appears to almost mushrooming over the top. When we look at this macaron shell from above, it also seems that the piping was inconsistent given the slight irregular shape of the circle. One of the possible causes for this above macawrong is due to over resting. Yes, that can happen! Resting your macarons for up to 2 hours depending on humidity can lead to positive results, but in this case this shell was rested for over 4 hours (it was a humid day, so I had thought that resting it more might help).  

In the macawrong above we see that there's a "fissure" where the feet should be. These are not feet, as we can see the bottom of the shell is rounded into the mat. We think this was due to two things, a large air bubble inside the macaron which caused the top of the shell to rise very quickly and result in the split. So tamping (or banging the sheet of macarons on the counter) can help bring the air bubbles to the top and the flatten the pointed tip on top of the macaron. Also using a toothpick to poke out the air bubbles after tamping will help.

This macawrong was caused because the shell was likely not dried long enough. When the macarons are dried enough, it should be dry to the touch. So when this macawrong was baked in the oven, it immediately cracked due to the heat of the oven. This crack can also occur if your oven is too hot or there is an air bubble in the macaron.

To ensure the best possible macarons follow along in my Macaron 101Macaron 102 and Macaron 103 posts. I walk you visually through all the equipment you will need and also tips and tricks at each step to help you be as successful as possible in your macaron journey. 


Let me know how it goes and feel free to leave me comments and we can trouble shoot together. Have fun despite the macawrongs! Always know that one day perfect macarons will come out of your oven!


Friday, March 20, 2015

Macaron Day 2015; Reasons Why I Started Blogging

Today, marks Macaron Day 2015! Who would have thought I would love these beautiful french desserts so much! Not only are they pretty to look at but the satisfaction that I get from making a batch of these is incredible. 

When I think about macarons, I also think back to where my blog started. Or more like, how it wouldn't have started had it not been for the encouragement of Dan and local Edmonton food bloggers (Sharon from Only here for the Food, Val from A Canadian Foodie to name a few) during my first food tweet-up back in 2010 at Edmonton's first Famoso Pizza!  Within a year, my fascination with macarons went from purchasing them from French bakeries, to attending a Macaron Mashup, to making them myself.


The macarons I blogged & baked back in 2011were not always stellar as Dan brought many a "maca-wrongs" to work for his coworkers. Over time, though, I became more and more interested in learning how to bake better macarons. Not only did I bake macarons every Thursday for the better part of a year, but I developed a charting system to track the macaronage process, resting time and even the optimal oven temperature! As some of you have experienced, making macarons is not an easy process but it's definitely a craft. Though not always fun and sometimes even frustrating, for me, the journey to making better macarons has been pretty rewarding! I can't wait to show you all some of the new macarons, shapes, and fillings we have in mind.


So, today I want to wish everyone a happy Macaron Day 2015 and to encourage everyone to follow their passions. If you blog, think back to why you started blogging. For me, I started mainly to share the food I was cooking at home, the restaurants I went to, and food events with family and friends back home in Toronto. Today, I continue to share new macaron recipes, as well as recipes that my husband and I have been making at home to share on the blog. I also realized that I love showing the process to how food is made - pictures with instructions mean so much more to me! I continually strive and hope to continue that in my blogging. Without which, I don't think blogging would be as enjoyable for me.

Saturday, February 14, 2015

Macaron Hearts with Raspberry Buttercream


Hello everyone! Hoping you are all having a wonderful Saturday. It was a bit snowy here in Edmonton but the light in the condo thankfully allowed me to take a quick photo of these beautiful heart macarons this morning before the day's festivities. This year's Valentine's day ended being different as we celebrated a friend's wedding! To celebrate I made these heart shaped macarons.

To make the macaron shells follow the instructions I have in my Macaron 101 post and in the Macaron 102 post


It has been a while since I made macarons let alone piping heart shaped macarons! They were a bit tricky to pipe by hand as you need to use a smaller piping tip. To pipe the hearts I piped two individual tear drop shapes for each heart. 


Raspberry Buttercream Recipe
Ingredients: 
  • 80g (approx. 1/2 cup) superfine sugar 
  • 25g water 
  • 1 whole egg 
  • 1 egg yolk 
  • 160g soft butter (cut into cubes) 
  • 1 Tbsp freeze dried raspberries 

Instructions:
  1. Bring sugar and water to a boil in a small pot. Heat the sugar to 250F(120C) using a candy thermometer. If it boils, clean the sides of the pan with a damp pastry brush. Try not to mix the solution, but allow it to heat on its own.
  2. In another bowl or the bowl of your KitchenAid whisk the eggs and egg yolks until it lightens in colour.
  3. Once the hot sugar mixture reaches 250F pour immediately into the whisking egg mixture. Then, increase to a higher whisking speed. Continue whisking until the mixture has cooled down completely. It will start to look like a meringue and be glossy.
  4. Keep whisking the meringue until it has cooled. Meanwhile, cream then whisk the butter until it has thickened. Once the egg mixture-meringue has cooled, add the butter. Add the whisked butter slowly into the meringue.
  5. Continue whisking until the buttercream is smooth. It may curdle slightly but this is okay. Keep whisking and the buttercream will come back together. Add in the tablespoon of freeze dried raspberry. Take a look at this video for making the buttercream.
  6. Once the buttercream has come together, immediately transfer the raspberry buttercream into a piping bag fitted with a nozzle (Here is a quick visual tutorial on piping bag basics). Match macaron shells by size, then pipe a small mound of raspberry buttercream onto each half shell using the smaller piping tip.


I really hope you end up making these macarons! They don't have to be heart-shaped like these ones, even the circular ones will be awesome! With the freeze-dried raspberries in the buttercream they tasted just like fresh raspberries. The sweetness of the shells balanced quite well with the tartness of the raspberry buttercream. 

Tuesday, November 4, 2014

Home made Pumpkin Spice Macaron Recipe and Answers to Common Questions


If you have been following along with me on twitter & Facebook, you will know that it has been a busy few weeks! First, in mid October I had the most amazing opportunity to travel to Vancouver to attend the Food Bloggers of Canada Conference where I met lots of fellow food bloggers, ate delicious meals and networked with several brands (more on the conference in later posts!).  I have also been baking a lot of macarons lately and recently have been teaching macaron classes! So, today's post comes from one of the macaron classes that I did this past weekend. Seeing that we are still in the season, the two ladies decided on making pumpkin spice macarons!


The recipe for the pumpkin spice macarons are actually covered in my Macaron 102 and Macaron 103 posts, so head on over to those two posts for the step by step directions. Also, if you haven't seen my post for making your own pumpkin spice make sure you take a look at that one as well!

I often get asked about what is involved with learning how to make macarons. 

Location?
You can make macarons in the comfort of your own kitchen! Over the past 3 years I have tried and tested many macaron recipes in a apartment kitchen with no special ovens. Lately, with the houses I have visited to make macarons I have brought along a simple oven thermometer ($5) to keep the baking temperature consistent. So, it goes without saying that you CAN make macarons in your home kitchen.

Special Equipment?
I have found that heavy baking pans (also known as heavy commercial jelly roll pans) are essential for making macarons. 

I also use a stand mixer such as a Kitchen Aid in order to beat the egg whites quickly and consistently. However, if you are comfortable doing this by hand such as using a whisk or a hand mixer it is possible.

A silicon baking mat (e.g. silpat) is nice to have, but not essential for baking macarons. You can use parchment paper.

For other equipment and ingredients that you will need, please read my Macaron 101 post. 


Do I need any special skills before trying to bake macarons?
No, you do not need any special baking or pastry skills before trying to make these delicious treats! The mixing process (also known as the macaronage) requires special attention to ensure that you do not over or under mix. Lastly, piping same sized macaron shells can be tricky at first but practice makes perfect! Each batch of my macarons produces around 60 shells so you will get lots of practice!

How much time do I need?
I tell my friends who want to learn, that it takes at least 4-6 hours for their first batch of macarons. This is mainly due to the time it takes to prep the ingredients, mix, pipe, resting time, bake and fill the macarons.

As well, what surprises many people is that the best time to eat and enjoy a completed macaron are after they have rested in the fridge (in an airtight container) for 2 whole days!

How long do homemade macarons last?
I typically freeze a portion of my completed macarons in the freezer and they are good for a month in an airtight container. The macarons in the fridge will usually stay fresh for about 5 days or 1 week after filling.

When you are ready to eat the macarons, take them out of the freezer and keep them in an airtight container to defrost for at least 2-3 hours.  Ensure you keep the lid on the macaron container while they defrost on the counter at room temperature.

My intention for this post is to show that macarons can be made at home. I was extremely happy that I had the opportunity to share my excitement for making macarons with some new friends! Please post any questions that you might have in the comments below! 

Thursday, October 16, 2014

Passion Fruit Chocolate Macarons - Step by Step Recipe


I am about to head out to the Food Bloggers of Canada Conference , so before I am off I thought I would share a new macarons recipe that I have been working on. The first time I made these, I used a very dark chocolate which ended up being too bitter and made it hard for the passion fruit flavour to come through. This time, I used Valrhona Manjari 64%  chocolate recommended by Jacqueline Jacek that I had picked up while at the Jacek Chocolate 104st opening back in August. I am much happier with this chocolate passion fruit ganache and the macarons taste way better this time round! 

Passion Fruit Macaron Shells

Directions: 
  1. To know what equipment and materials you need to make macarons, visit my Macaron 101 post. Then, follow with my Macaron 102  post for learning how to make the macaron shells. 
  2. The only difference is that you will need 2 drops of yellow gel food colouring and 1 drop of red gel food colouring for the passion fruit shell colour. 
  3. After the shells have been baked and cooled, prepare to make the passion fruit chocolate ganache.

Passion Fruit Chocolate Ganache Filling


Ingredients:
  • 200g Valrhona Manjari 64%
  • 200g cream
  • 1-2 tsp of freeze dried passion fruit powder
Directions:
  1. Measure out all the ingredients. Roughly chop the chocolate pieces with a serrated knife.
  2. Set up a double boiler and melt the chocolate. Meanwhile in a another pot bring the cream to a boil. Use a whisk to prevent the cream from sticking to the base of the pot. As the chocolate melts use a spatula to stir. The chocolate should all melt in about two or three minutes. Once the chocolate has melted completely remove the bowl from the double boiler and stir until smooth.
  3. Pour the hot cream in thirds into the centre of the bowl and stir until the consistency of the ganache begins to thicken.
  4. Whisk from the sides of the bowl in wide circles. It should gradually thicken.

  5. Add in the freeze dried passion fruit powder to the chocolate ganache.
  6. Pour the ganache into a gratin dish using a spatula. Cover the ganache with saran wrap so that the saran touches the surface. Allow the ganache to cool completely before placing it in the fridge and it is thickened.
  7. Match macaron shells by size, then pipe a small mound of passion fruit ganache onto each half shell.
  8. Top with the remaining shell and give a slight twist to secure the macaron together. Allow the macarons to rest in the fridge for two days or freeze them before you enjoy them. Trust me! They will taste way better!

Do you think you will try making these Passion Fruit Chocolate Ganache Macarons? If no, what other flavours do you have in mind?

Monday, May 5, 2014

Comparing Two types of Matcha (Green Tea)


A few weeks ago I was contacted by KissMe Organics to try out their Organic Matcha. I agreed and decided to make a batch of Matcha Macarons for comparison. Up to this point in time, I have been using a Matcha (green tea) powder sourced from Japan. I was interested to see if there would be any difference in terms of the texture of the resulting buttercream, look and taste of each macaron.
Closer look of the two matchas

Looking closely at both matchas, the one sourced in Japan has a slightly darker colour in comparison to the one from KissMe Organics. Texture and fineness of the both matcha powders seemed fairly similar. 

Matcha Buttercream made from KissMe Organics Matcha
Once I finish making buttercreams for macarons, I fill the macaron shells right away. For the buttercream made with matcha sourced from Japan, there is slightly darker colour to the buttercream. On the other hand, the buttercream made from KissMe Organics took on a slightly brighter green colour.
Left: Matcha sourced from Japan. Right: KissMe Organics Matcha sourced from China
Visually, both macarons are very similar if we look only at the buttercreams. I must also note that for the matcha buttercream sourced from Japan macaron (on Right), had been previously frozen (then brought back to room temperature) so the buttercream may look slightly more stiff in comparison to the other one.


In terms of taste, there was just subtle differences in taste. In fact both taste very similar. As you bite into the macaron, you get a gentle mouthfeel of green tea (matcha) flavour along with the characteristic known to a macaron. However, the buttercream made from KissMe Organic's matcha had a hint more of a chalky taste especially when comparing both macarons at the same time. 


I also brought a tray of the macarons made from the KissMe Organic matcha to a foodie function, and shared them with friends and family.  No one seemed to notice anything significant about the taste and texture of the macarons; in fact, they loved the intense green tea flavour that you got with each bite.  


Thursday, March 20, 2014

Macaron Day - March 20, 2014 & Passion fruit Macarons


Pumpkin Spice & Earl Grey Macarons
Happy Macaron Day! Today, I bring you some of my favourite macaron flavours from the archives and the recipe for a new macaron flavour! 

For all of the recipes that I am featuring today, I am using a french meringue method. Take a look at my macaron tutorials for the macaron basic posts. Pictured above are two of my favourite flavours lately, pumpkin spice and earl grey macarons. These macarons impart some strong flavours, especially earl grey as it is such a classic. Pair either of these macarons with a cup of latte or tea! 


Passion Fruit Macarons

Directions:
  1. To make the shells of the passionfruit macarons, follow my Macaron 101 and Macaron 102 post. For the gel food colouring I used 2 drops of yellow gel food colouring and 1 drop of red gel food colouring.
  2. After shells have been baked and cooled, prepare to make the passionfruit buttercream.

Passion Fruit Buttercream

Ingredients: 
  • 80g (approx. 1/2 cup) superfine sugar 
  • 25g water 
  • 1 whole egg 
  • 1 egg yolk 
  • 160g soft butter (cut into cubes) 
  • 1-2 tsp of freeze dried passionfruit powder


  1. Bring sugar and water to a boil in a small pot. Heat the sugar to 250F(120C) using a candy thermometer. If it boils, clean the sides of the pan with a damp pastry brush. Try not to mix the solution, but allow it to heat on its own.
  2. In another bowl or the bowl of your Kitchen Aid whisk the eggs and egg yolks until it lightens in colour.
  3. Once the hot sugar mixture reaches 250F pour immediately into the whisking egg mixture. Then, increase to a higher whisking speed. Continue whisking until the mixture has cooled down completely. It will start to look like a meringue and be glossy.
  4. Keep whisking the meringue until it has cooled. Meanwhile, cream then whisk the butter until it has thickened. Once the egg mixture-meringue has cooled, add the butter. Add the whisked butter slowly into the meringue.
  5. Continue whisking until the buttercream is smooth. It may curdle slightly but this is okay. Keep whisking and the buttercream will come back together. Add in the passion fruit powder, and whisk to incorporate, Take a look at this video for making the buttercream (it's for a different buttercream, but will still give you an idea of what it should look like).


  6. Once the buttercream has come together, immediately transfer the passion fruit buttercream into a piping bag fitted with a nozzle (Here's a quick visual tutorial on piping bag basics). Match macaron shells by size, then pipe a small mound of passion fruit buttercream onto each half shell.
  7. Assemble the macarons and enjoy!
They should look just like these Salted Pistachio macarons! Incidentally, the Passion Fruit Macarons taste so good! You really should make them. Oh, and for those interested, I purchased the freeze dried passion fruit powder from Duchess Provisions here in Edmonton. Here's the recipe for these Salted Pistachio Macarons.


What are some macarons that you had today to celebrate Macaron Day 2014? Which flavours would you want to make or eat?

Sunday, February 2, 2014

Macaron 103 - Buttercream Making and Macaron Assembly


In the past two posts we talked about What's in a Macaron, and How to Make Macaron Shells at Home. This third post will talk about making the buttercream and the finally assembly of the macarons. I've chosen to make pumpkin spice buttercream as the example. 

Pumpkin Spice Buttercream

Ingredients:
  • 80g (approx. 1/2 cup) superfine sugar 
  • 25g water 
  • 1 whole egg 
  • 1 egg yolk 
  • 160g soft butter (cut into cubes) 
  • 2 Tbsp pure pumpkin puree 
  • 1 1/2 Teaspoons pumpkin spice

Food Notes:
  • Superfine sugar can be made by taking granulated sugar and processing in a food processor.
  • You can purchase pumpkin spice at the store or make your own.

Directions for Homemade Pumpkin Spice Buttercream

  1. Bring sugar and water to a boil in a small pot. Heat the sugar to 250F(120C) using a candy thermometer. If it boils, clean the sides of the pan with a damp pastry brush. Try not to mix the solution, but allow it to heat on its own.
  2. In another bowl or the bowl of your Kitchen Aid whisk the eggs and egg yolks until it lightens in colour.
  3. Once the hot sugar mixture reaches 250F pour immediately into the whisking egg mixture. Then, increase to a higher whisking speed. Continue whisking until the mixture has cooled down completely. It will start to look like a meringue and be glossy.
  4. Keep whisking the meringue until it has cooled. Meanwhile, cream then whisk the butter until it has thickened. Once the egg mixture-meringue has cooled, add the butter. Add the whisked butter slowly into the meringue.
  5. Continue whisking until the buttercream is smooth. It may curdle slightly but this is okay. Keep whisking and the buttercream will come back together. Add in the pumpkin puree, whisk to incorporate, then add in the pumpkin spice. Take a look at this video for making the buttercream.
  6. Once the buttercream has come together, immediately transfer the pumpkin spice buttercream into a piping bag fitted with a nozzle (Here's a quick visual tutorial on piping bag basics). Match macaron shells by size, then pipe a small mound of pumpkin spice buttercream onto each half shell.
  7. Top with the remaining shell and give a slight twist to secure the macaron together.
This last post is the end of the Macaron tutorial. I would love to see the macaron creations you make! Just post them in the comments below.

If you want to make other Macaron flavours here is a current list of recipes that I have on the blog:

Strawberry Macarons  (note: this one uses an Italian method to make the macaron shello but you can use the buttercream flavour)

More exotic flavours

Connect with me on twitter @beyondumami or on Facebook.