Friday, March 27, 2015

Texas Adventures- Austin Day 1 @ Easy Tiger


Today was a day of many firsts! Why do I say that? First of all I don't think I have ever woken up for a flight at 3 am. In some ways it was similar to me taking one of my regular naps instead of a good night's sleep. Another first is that thanks to Dan winning a door prize, we were able to fly business class! Not only was there a lot of leg room, but a full serviced breakfast. Also if you wanted to have beer, wine or alcohol you could! If it wasn't for the fact that it was 6 am in the morning and we were about to drive for a couple of hours we would have definitely had a glass or two in the air. 


During our drive down to Austin we passed several people taking photos of blue bonnets; which means Sprig has definitely arrived in Texas! We found our accommodations without too much trouble and after some rest, headed out to Easy Tiger for some food!


Easy Tiger is both a German bake shop and a beer garden so we checked out their pastries (packing some away for breakfast/late night snack) before heading down to the restaurant portion.


The weather in Austin has been super nice (27 C and sunny) which meant that we could take full advantage of the outdoor beer garden. We sat at communal picnic tables in the patio which is next to the ping pong tables and enjoyed our food. 

Borrego Verde - Housemade sausage of Lamb, Pork, Poblano, Cumin, with Tomatillos and green chile salsa on a pretzel bun.

Smoked Turkey Breast on Pain au Levain bread avocado, radish, roasted jalapeno aioli. 

Since we liked the pretzel bun so much and was still a bit hungry we decided to order a share plate. 

"Snack Board" - 2 small pretzels, large beer cheese, house mustard, chex mix, and beef summer sausage.

We left Easy Tiger thoroughly satisfied and full, we can't wait to check out some of the other things (including BBQ!) in Austin over the next few days. 

Hopefully we'll be able to keep you all updated with our adventures in Austin. Stay tuned for more!

Easy Tiger
East 6th Street. 
Austin, TX

Wednesday, March 25, 2015

Cooking with Chef Lynn Crawford & Catelli Healthy Harvest Ancient Grains Giveaway


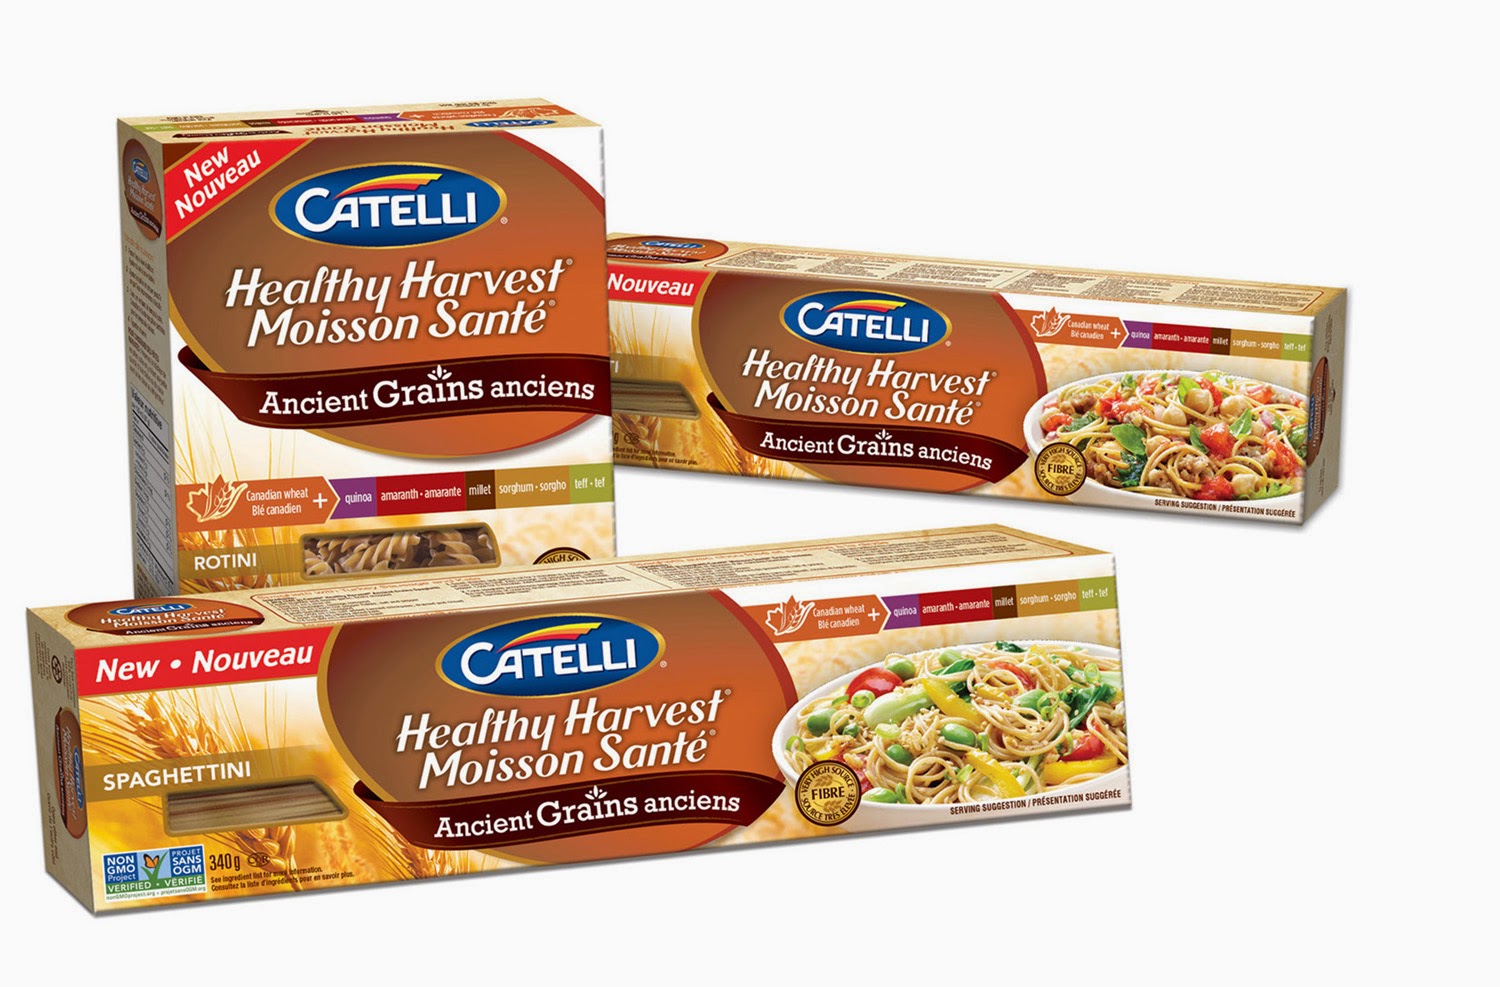
Last Wednesday I had the incredible opportunity to meet Chef Lynn Crawford! You probably recognize her from Food Network's Chopped Canada or Pitchin In. Last week, Chef Lynn Crawford was out in Western Canada cooking and demoing Catelli's newest line of pastas - Healthy Harvest Ancient Grains.

It was a great night enjoyed by all in Get Cooking's space filled with tasty pasta ideas from Chef Lynn Crawford, canapés from the Get Cooking team, and demos of Catelli's Ancient Grain Pasta from Chef Lynn Crawford. We also had the opportunity to put together a dish using Catelli's pasta ourselves! 

Phyllo pastry with crunchy pear and pear soup (left from Evert), buckwheat noodle with yellow asian pear and a cumin coconut pancake (right from Alexei of S'wich Food Truck). 
The pasta is made with 100% whole grain Canadian wheat and five ancient grains: quinoa, amaranth, millet, sorghum and teff. 

We also learned how cooking times could affect the firmness of the pasta. However, the firmness depends on preferences as well so there can be a lot of variety in cooking times.


One of the exciting parts of the evening was watching Chef Lynn Crawford demonstrate a simple but delicious dish of pesto-dressed spaghettini and marinara rotini with fresh shavings of cheese on top. 

Then all of us food bloggers and the media (after taking photos) cleaned our plates!

After all the demos, we divided into groups to make our own Chilled Noodle Salad with Ginger Wasabi Dressing to take home and of course photograph.

Of course, I had a slight celebrity chef fan-girl moment when I wanted to get a picture with Chef Lynn Crawford. The bonus was when I shared with her that she could use a timer for selfies, she even instagramed our photo!


Giveaway


Alright! So I am excited to share that one lucky Canadian reader or follower can win a year's supply of Catelli®'s Healthy Harvest Ancient Grains pasta through this blog! Catelli® will ship the year supply of pasta to you. This giveaway is open only to residents of Canada. Enter the giveaway in the Rafflecopter below with your details. Make sure you leave a comment as that is the mandatory requirement for entering the giveaway. Good luck!

Prize: One (1) lucky reader or follower will win a year supply of 
Catelli® Healthy Harvest Ancient Grains Pasta (60 boxes, valued at approximately $200).

Duration: Giveaway closes on Wednesday April 8, 2015.

Who Can Enter: Open to residents of Canada.

Mandatory Entry: Leave a comment on this post about what dish you will make with this pasta and with which type of pasta (Spaghetti, Saghettini or Rotini). Need some inspiration? Visit Catelli's recipes.

How to Enter: Please follow the instructions in the Rafflecopter below. Remember that leaving a comment is mandatory. Additional entries included in the Rafflecopter.

How will the winner be chosen: The winner will be chosen at random and will be notified via email. The winner will have 24 hours to respond or a new winner will be chosen.


a Rafflecopter giveaway

Friday, March 20, 2015

Macaron Day 2015; Reasons Why I Started Blogging

Today, marks Macaron Day 2015! Who would have thought I would love these beautiful french desserts so much! Not only are they pretty to look at but the satisfaction that I get from making a batch of these is incredible. 

When I think about macarons, I also think back to where my blog started. Or more like, how it wouldn't have started had it not been for the encouragement of Dan and local Edmonton food bloggers (Sharon from Only here for the Food, Val from A Canadian Foodie to name a few) during my first food tweet-up back in 2010 at Edmonton's first Famoso Pizza!  Within a year, my fascination with macarons went from purchasing them from French bakeries, to attending a Macaron Mashup, to making them myself.


The macarons I blogged & baked back in 2011were not always stellar as Dan brought many a "maca-wrongs" to work for his coworkers. Over time, though, I became more and more interested in learning how to bake better macarons. Not only did I bake macarons every Thursday for the better part of a year, but I developed a charting system to track the macaronage process, resting time and even the optimal oven temperature! As some of you have experienced, making macarons is not an easy process but it's definitely a craft. Though not always fun and sometimes even frustrating, for me, the journey to making better macarons has been pretty rewarding! I can't wait to show you all some of the new macarons, shapes, and fillings we have in mind.


So, today I want to wish everyone a happy Macaron Day 2015 and to encourage everyone to follow their passions. If you blog, think back to why you started blogging. For me, I started mainly to share the food I was cooking at home, the restaurants I went to, and food events with family and friends back home in Toronto. Today, I continue to share new macaron recipes, as well as recipes that my husband and I have been making at home to share on the blog. I also realized that I love showing the process to how food is made - pictures with instructions mean so much more to me! I continually strive and hope to continue that in my blogging. Without which, I don't think blogging would be as enjoyable for me.

Tuesday, March 10, 2015

Edmonton Coffee Week - #yegcoffeeweek


Have you heard? If you are in Edmonton, this past saturday marked the first Edmonton Coffee Week running from March 7-15, 2015. 


For the next few days there are several participating coffee shops and events all featured around coffee! Now, I for one cannot live without coffee! So, who doesn't love learning about how to make latte art and all the beautiful creations that could be made on those mochas, lattes, and chai teas? So, I was super excited when the opportunity came up to learn some latte art from François at Cafe Bicyclette. 


Before we even get into the latte art, you need a shot of espresso. Make sure you get the right grind on your espresso (not too coarse and not too fine). Once the espresso grinds are piled up in the portafilter (like the photo below), you tamp it evenly.


Fit the portafilter into the espresso machine (there are grooves to guide) and make sure it is tight. Too loose and espresso will go everywhere - which is apparently not a pretty sight! Also, ensure there are no coffee grinds in the espresso cups before running the espresso through.


Once the espresso is done, pour them into your cup. Then, pour the cold milk into the milk frothing pitcher. François did mention that using whole milk is slightly better as it helps to give a nicer look to the latte art. Plus the milk stays creamy.


Heating the milk was the tricky part for me. You had to make sure that it didn't overflow or get too hot. Once the milk frothing container is hot to the touch than it is done. Using a milk thermometer probably would be helpful as you are learning to ensure that the milk isn't burnt.
 

Now, the part everyone wants to perfect is the actual latte art! You do need to multi-task as you need to quickly wipe down the milk steamer while swirling and tamping the hot milk to get the bubbles out so it will be creamy. When it comes to pouring the hot milk into the cup with the espresso, there should be no hesitations! Below, is my attempt at a heart or more like a heart shaped balloon!


So, it was without a doubt a fun hour introducing me to latte art! I think practice would make perfect! And, clearly that was a great latte as I am wired enough to write this post at 12am. Hopefully there will be more opportunities to learn about latte art in the future. In the meantime, I might try watching Chef Steps - Latte Art to hone this skill. 

If you have a chance, check out all the other Edmonton events for YEG Coffee Week or visit a local coffee shop for a latte or two! 

Couldn't leave without buying this amazing pain au chocolat to have with my latte. 

Saturday, February 14, 2015

Macaron Hearts with Raspberry Buttercream


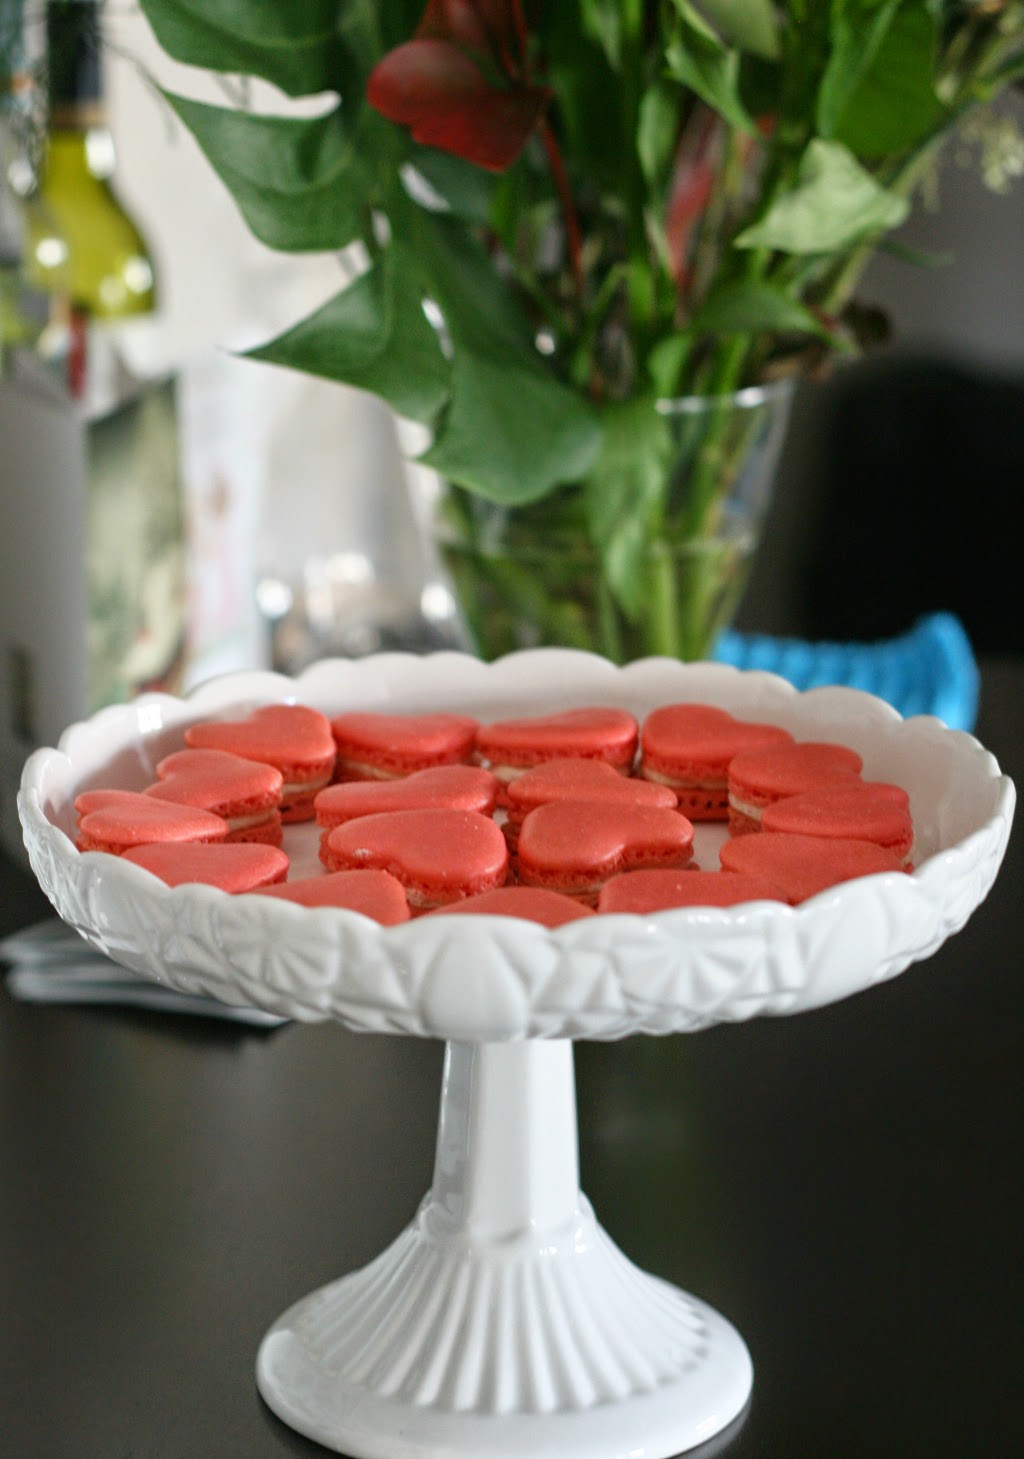
Hello everyone! Hoping you are all having a wonderful Saturday. It was a bit snowy here in Edmonton but the light in the condo thankfully allowed me to take a quick photo of these beautiful heart macarons this morning before the day's festivities. This year's Valentine's day ended being different as we celebrated a friend's wedding! To celebrate I made these heart shaped macarons.

To make the macaron shells follow the instructions I have in my Macaron 101 post and in the Macaron 102 post. 


It has been a while since I made macarons let alone piping heart shaped macarons! They were a bit tricky to pipe by hand as you need to use a smaller piping tip. To pipe the hearts I piped two individual tear drop shapes for each heart. 


Raspberry Buttercream Recipe
Ingredients: 
  • 80g (approx. 1/2 cup) superfine sugar 
  • 25g water 
  • 1 whole egg 
  • 1 egg yolk 
  • 160g soft butter (cut into cubes) 
  • 1 Tbsp freeze dried raspberries 

Instructions:
  1. Bring sugar and water to a boil in a small pot. Heat the sugar to 250F(120C) using a candy thermometer. If it boils, clean the sides of the pan with a damp pastry brush. Try not to mix the solution, but allow it to heat on its own.
  2. In another bowl or the bowl of your KitchenAid whisk the eggs and egg yolks until it lightens in colour.
  3. Once the hot sugar mixture reaches 250F pour immediately into the whisking egg mixture. Then, increase to a higher whisking speed. Continue whisking until the mixture has cooled down completely. It will start to look like a meringue and be glossy.
  4. Keep whisking the meringue until it has cooled. Meanwhile, cream then whisk the butter until it has thickened. Once the egg mixture-meringue has cooled, add the butter. Add the whisked butter slowly into the meringue.
  5. Continue whisking until the buttercream is smooth. It may curdle slightly but this is okay. Keep whisking and the buttercream will come back together. Add in the tablespoon of freeze dried raspberry. Take a look at this video for making the buttercream.
  6. Once the buttercream has come together, immediately transfer the raspberry buttercream into a piping bag fitted with a nozzle (Here is a quick visual tutorial on piping bag basics). Match macaron shells by size, then pipe a small mound of raspberry buttercream onto each half shell using the smaller piping tip.


I really hope you end up making these macarons! They don't have to be heart-shaped like these ones, even the circular ones will be awesome! With the freeze-dried raspberries in the buttercream they tasted just like fresh raspberries. The sweetness of the shells balanced quite well with the tartness of the raspberry buttercream. 

Sunday, January 18, 2015

Savoury Tomato and Ham Pie with a Cheddar Cheese Pastry Crust


I don't typically plan our meals, as often Dan finds ingredients in the fridge and makes something for dinner. This pie is the product of our "meal planning" (i.e. how to use up a lot of leftover braised pork shoulder). When we thought of what to make with the leftover ham, comfort food came to mind and who doesn't love pie? There is no hard rule that says pies must be sweet and adding cheese to this pie dough not only makes it tasty but also keeps it flaky.

Ingredients

Pastry
  • 2 1/2 Cups All Purpose Flour
  • 3 Teaspoons baking powder
  • 1 Teaspoon salt
  • 2 Tablespoons unsalted butter
  • 2 Tablespoons coconut oil
  • 1/2 Cup of grated cheddar cheese (we used tillamook cheddar)
  • 1/2 Cup of Milk

Filling
  • 2 Tablespoons unsalted butter
  • 1 small onion chopped
  • 1 can of plum tomatoes
  • 3 Cloves of Garlic
  • Approximately 1 cup of leftover roasted ham/pork shoulder chopped
  • 2 Tablespoons All purpose Flour
  • 2 Tablespoons grated parmesan cheese 
  • Salt/Pepper to taste
  • 1 egg white, beaten


Directions

  1. In mixer, add flour, baking powder, salt, butter, coconut oil, and cheese. Beat until combined. Add milk to pull the ingredients together.

  2. Remove the dough from the mixer, wrap it in saran wrap and place it in the fridge for 30-45 minutes. This will help solidify the dough to make it easier to roll out later. Try not to leave the dough in the fridge for too long as it will become very hard, on the other hand leaving the dough in the fridge for too short of a time will result in crumbly dough that doesn't come together.

  3. Meanwhile assemble the ingredients for the filling.

  4. In a medium sized pot, heat the butter. Once the butter has melted add the onions and garlic. Cook until the onion becomes semi-translucent; almost clear.

  5. Add the canned tomatoes and peppers to the sauce. Then add the flour and toss well.


  6. Remove the dough from fridge and split it into into halves.

  7. Coat an 8-inch pie pan with butter. Taking half of the dough, roll it into a circle that is larger than the pie dish.

  8. To transfer the dough to the pan, use the rolling pin.


  9. Use your fingers to push the dough down into the dish.


  10. Fill the pie with the tomato filling. Then, sprinkle the chopped hame into the tomato mixture.


  11. Take the second half of the dough, roll it into a circle, then cut into strips.

  12. Place the strips of dough on top of the pie.

  13. Preheat the oven to 400F. Brush the pie with an egg-white wash.

  14. Bake initially for 10 minutes at 400F, then reduce the heat to 375F and bake the pie for another 35-45 minutes. The pie should begin to bubble when it is ready to eat.


  15. Serve warm.

 Ham, Tomato and Cheese is a classic combination that definitely cannot go wrong. This pie was a hit and a great way to use up leftover meat. We will definitely revisit this pie soon.