Saturday, November 12, 2011

Macarons with Mirabelle Macarons


Macarons - my latest obsession! Except, the macarons that I'm featuring today or not mine but Connie's, the owner and creator of Mirabelle Macaron in Edmonton.  In fact, in my quest for baking a successful batch of macarons, I've had the wonderful opportunity to bake with Connie. Recently, Connie had a mini 'macaron tweetup' and a few of us had the privilege of sampling some of her delicious wares. Check them out! 
A box full of deliciousness and likely a macaron attack!
In my understanding, Connie's macarons have the same characteristics that all macarons should embody: that is, crispy-but-not-too-crispy shell with a soft chewy texture complimented by a flavoured buttercream or ganache filling. Prior to Mirabelle Macarons, to purchase macarons in Edmonton you had to visit my favourite place, Duchess Bake Shop. So, it's only natural to want to know what the difference is between Mirabelle Macaron's and Duchess' macarons. So far, I can tell you that Connie's macarons are on par with Duchess. It's exciting to see someone experiment with flavours that I have not had a chance to try in Edmonton (such as her Milk Chocolate Passionfruit).

Of the many macarons flavours that Connie brought for us to sample here are a few that I tried that day.  

From left to right: Milk Chocolate Passionfruit, Matcha Green Tea, Passionfruit Cream
When you bite into the Milk Chocolate Passionfruit macaron you get the crunchy texture of the macaron shell, followed by two flavours; first of chocolate and then immediately passionfruit. This makes a very good tasting macaron!

The matcha green tea macaron has a matcha buttercream filling between its two coloured shells. Matcha is the main powder used to make Japanese Green tea and found commonly in green tea ice cream! It's a very light flavour in general, but Connie's macarons were able to convey the flavour very well!

Mirabelle Macaron's Passionfruit cream macaron is similar to the milk chocolate passionfruit cream macaron but without the chocolate ganache. The passionfruit flavour offsets the sweetness of the macaron shell thus making it a good combination.

The chai-flavoured macaron pictured below has a chai flavoured buttercream and is dusted with cinnamon. I took a picture of the half-bitten macaron to show that there are no air pockets in these macarons! From my own personal attempts at making macarons, I know that having no air pockets is extremely tricky to master as you do not want to overmix during the macaronage process. 

Connie's Berry Cream Macaron has multiple berry flavours infused into the buttercream. I really think that Connie excels in incorporating strong fruit flavours into the ganache and buttercream.

If you want to try out Mirabelle Macarons you can order them by contacting Connie on her website www.mirabellemacarons.com. She'll also have a booth at the Edmonton City Market Downtown on December 3rd 2011. If you want to learn how to make macarons, Connie is also teaching a macaron making class in February 2012. You can register for the class through the Taste Tripping website.

Saturday, October 29, 2011

Lemon Curd Macarons - Success!

I'm so proud of my latest batch of macarons. They are absolutely, hands-down the best batch of macarons I've made thus far! Of course, they could be better, but I'm still super excited to show them off. 
For this batch, the major differences from the Pinktober macarons was that I didn't add cream of tartar, had some pretty old egg whites (though ended up having 80g of old and needing to add in 20g of new egg white) and I hand mixed during the macaronage process. 
I am pretty certain that you do need old egg whites for a regular batch of macarons, except I was out 20g of egg white for this batch so that is why I ended up adding a fresh egg white. I think the key is that the egg whites have to be room temperature before mixing.
For this batch I followed the same recipe from Not so Humble Pie  and during the macaronage process I followed the mixing process as demonstrated by Chef Nini. The process that she describes is slowly adding your almond mixture into the egg whites in a clockwise direction. She also split her almond mixture into 6 parts; with each section taking about 11 turns. Here's what I did: 1st part= 16 turns, 2nd part = 11 turns, 3rd part = 14 turns, 4th part = 11 turns, 5th part = 11 turns, and 6th part = 23 turns. Take a look at the video for a more detailed visual. 
The key is to go in a clockwise rotation without going through the middle of the mixture. My theory is that by doing so you don't "crush" the air bubbles in the egg whites. Again, you want to achieve the look of magma by the end of your mixing. For this attempt, the end result was a rather thick and heavy, but "magma" like mixture as you can see from the pictures. After piping into small disks, the macarons sat out for approximately 20 minutes before putting into the oven. They were baked at 295F and baked for a total of 14 minutes; turning the tray at 7 min. 

Lemon Curd
  • 3 egg yolks (strained)
  • 1/2 cup sugar
  • 1/4 cup of lemon juice (or 1 lemon)
  • 2 ounces cold butter (approx. 1/4 cup)
  • 1/2 tbsp. grated lemon zest
  • 1/2 cup of cornstarch (mixed with a small amount of water).
Directions:
  1. Strain egg yolks through fine wire mesh.
  2. Place a bowl (could be stainless steel or ceramic) over a pot of simmering water.
  3. Whisk eggs and sugar together until well blended
  4. Add lemon juice.
  5. Continue whisking, in order to prevent curdling.
  6. Continue mixing until the mixture becomes thick (consistency should be like sour cream). This can take approx. 10 minutes.
  7. Add in 1/2 cup of cornstarch with small amount of water to help thicken the lemon curd. (note: this helped to thicken the curd, but overtime leaves a chalky texture in the macarons)
  8. Once thickened, remove from heat. Add butter, one piece at a time in chunks. Continue to stir with a wooden spoon until it is smooth.
  9. Add lemon zest and mix well
  10. Transfer mixture to a medium bowl. Cover the surface of the curd with saran wrap in order to prevent a skin from forming. Place bowl in fridge and allow it to become chilled. This can take about an hour. The curd should keep well in the fridge for up to a week. 

Sunday, October 23, 2011

Foray into Macaron Making - Pinktober Macarons


We all go through cravings/fetishes at some point in time. Some times they are shoe related, or clothing related or food related! Unlike clothing related fetishes, baking fetishes often take time and energy to perfect. You can't quite buy the item and then be content. There often is a burning desire to become competent in baking that particular item. For a while I was obsessed with making waffles as my previous post highlights. Lately, it has been the pursuit of making the elusive macaron!

After reading and researching a number of macaron recipes, I knew I was ready to start. I decided the October Mac Tweets Challenge was a good incentive. So, I spent time over the Canadian Thanksgiving long weekend for my first attempts. I also armed myself with some macaron making items in order to give my macarons their best possible chance (i.e. silpat mat, thicker baking sheet, albumen powder, aged egg whites). I also hoped to achieve the pied on my macarons. I'm not sure if you need a thicker baking sheet, but it definitely helps prevent the macarons from cooking too fast as they rise in the oven - which gives them the pied. The albumen powder (dehydrated egg white powder) gives more stability to the meringue structure so the shells will stand up better in the oven as heat is being pushed through it from the bottom. 

After two attempts (of which I'll post later), I came up with my third attempt (pictured below). With this third attempt, I followed the recipe from Not So Humble Pie. This time, though, I was able to use albumen powder as my previous two attempts only used cream of tartar. I did make one small variation by adding a pinch of tartar; and adjusting the other ratios so they would still be the same. I also processed the powdered sugar and almond meal together and sifted before mixing into the meringue. Here is the recipe I ended up using:

  • 5g dehydrated egg white powder (albumen)
  • 27g granulated sugar
  • 1g of cream of tartar
  • 225g confectioners (powdered) sugar
  • 125g almond meal
  • 100g aged egg whites

Directions:

  1. Measure and mix together albumen, granulated sugar and cream of tartar in a bowl and set aside.
  2. Place aged egg whites into mixing bowl (ensure it is perfectly clean) and begin beating egg whites on low speed until foamy. 
  3. Once egg whites are foamy (they should look bubbly and white), slowly add in mixture from step 1 and beat on medium speed (speed 5/6 on KA).
  4. Beat until a firm meringue forms. Do a check by stopping the mixer and tilting the head back to check the firmness of the peak. If a peak stays up, then you are done. Ensure that they are not stiff or foamy since that means you have gone too far!
  5. Add in food colouring (gel colouring is best) with a toothpick. Stir until uniform in colour.
  6. Add almond mixture into meringue mixture.
  7. Stir with paddle attachment on Kitchen Aid for 10 seconds then stop.
  8. Unhinge mixing bowl and stir rest with a spatula until magma-like consistency.
  9. Put batter into piping bag with large piping tip (I used Wilton 1A tip).
  10. Lay Silpat or Silicon baking sheet on baking pan.
  11. Pipe circles a little larger than a quarter coin size onto Silpat (or Silicon Baking Sheet) 
  12. Smack the baking pan against the floor with both hands to force air bubbles to the top.
  13. Poke air bubbles with toothpick.
  14. Let it rest for 30 minutes (I discovered this varies with humidity, on a really dry day you only need 15 minutes) until skin forms on the macaron surface.
  15. Preheat oven to 290F (this temperature depends on the size of your macarons and type of oven, I have a standard NON-convection oven).
  16. Place the baking pan into the oven and set a timer for 7 minutes.
  17. At 7 minutes, rotate the baking pan (this is to try and get even heating for all the macarons. Some instructions have said you should create a tent above the baking pan to prevent browning but did not seem necessary for my oven.
  18. After another 7 minutes, I rotated the pan once more and baked for 1 more minute.
  19. Let it cool on the baking sheet before removing from baking sheet. 
Here are my Macs for the Mac Attack #24 Pinktober Macarons 

Strawberry Jam Buttercream

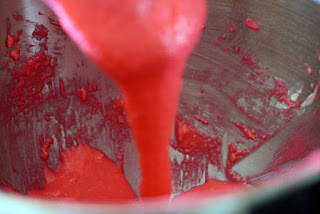
For the buttercream recipe, I used a Swiss Meringue Buttercream recipe. Since the buttercream recipe makes a massive amount, I cut it down to the following amounts using the same technique. 

  • less than 1/2 cup of sugar
  • 1 egg white
  • 1/2 cup of butter
  • 3 1/2 tbsp (50 grams) of strawberry jam

 So there you have it, my first successful foray into the world of macarons - Strawberry Jam Pinktober Macarons!


Wednesday, October 19, 2011

Waffles, Waffles, Waffles!

Over the past year, I have been extremely addicted to waffles! At every farmer's market I would hunt down the Eva Sweet Waffle truck, order waffles at Culina Highlands, and check out the other waffle trucks such as Wanda's Waffle. The sort of waffle I was craving for was the round Belgian style waffle that was crispy on the outside, air pockets on the inside and slightly sweet for taste. After numerous variations of different waffle recipes and using 2 different waffle irons I have now come up with a good working waffle recipe that creates exactly what I'm looking for! The added bonus is that this recipe is super easy to make. It is slightly on the runny side after mixing, but this is needed to create the crispy shell.
Classic Belgian Waffles (makes approx. 8 large waffles)
1 1/2 cups (395 ml) water
2 1/4 tsp (11ml) active dry yeast (or 1 packet)
3 cups flour (sifted)
1/4 tsp salt
3 large eggs, separated and 1 egg white
1/3 cup (75 ml) sugar
1 1/2 cups (375 ml) whole milk (I used 1% for this recipe)
8 tbsp unsalted butter (melted & cooled) 
2 tsp vegetable oil
2 tsp vanilla extract
Directions:
1. Heat 3/4 cup of the water to lukewarm. Safe the rest of later.
2. Dissolve the yeast. Add a pinch of sugar (You can also use honey or maple syrup).
3. Let stand for 5-10 min until foamy in a draft free place (i.e. microwave/toaster oven)
4. In a large bowl sift flour and salt, stir & blend. Set aside for later.
5. When yeast mixture is foamy, add egg yolks, one of the egg whites and rest of sugar to the yeast mixture. Add the rest of the water, milk, melted butter, oil, vanilla. 
6. Stir yeast mixture until smooth (I use the KA to complete step 5).
7. When yeast mixture is smooth, add flour to yeast mixture. Stir until smooth.
8. Beat egg whites until stiff peaks form. Fold into yeast mixture.
9. Let batter stand for 1 hour. Stir every 15 minutes. (You can cover with a cloth or saran wrap. The batter will start rising in the first 10 minutes).
Making the waffles:
1. I am using a Cusinart rotating waffle maker. I've found that placing it on setting 7 gives the waffle a nice warm golden colour.
2. Add approximately 1/2 cup to the waffle iron. Spread mixture. Close iron and turn. If the batter starts bubbling out the sides of the iron, try using less batter on your next waffle.
3. When the waffle iron beeps, flip waffle iron back over and remove waffle.
4. Place on cooling rack.
These waffles are easily frozen, and will stay good for over 2 weeks. Chances are you won't have them in your freezer that long! I usually make a batch and freeze 4 waffles in a large freezer bag. I usually eat my waffles in the morning by lightly toasting in the countertop oven (though we've also have them for supper at times!). My waffles usually enjoy a variation of toppings such as maple syrup, fruit, strawberry jam, chicken stir-fry or whatever your heart desires.

Sunday, September 25, 2011

B-Tsai Dessert House

Update: This location has unfortunately closed.

Before leaving Edmonton back in June, I noticed that a new Bubble Tea House was set to open beside Orignal Joe's on 109 St. We managed to go in and talk to the owner, who was in the midst of completing renovations. He told us that this location was a branch of his very popular Bubble tea store in Calgary (of the same name - B-Tsai Dessert House). He was very excited and encouraged us to come back when it opened.

Some friends of ours in Calgary had taken us to B-Tsai Dessert House when we visited Calgary and I recalled enjoying the Blackberry juice Bubble Tea (made purely from blackberries with no other additives or extra sweeteners). 


So upon returning to Edmonton in August, I was excited to try their bubble tea. We went on a Saturday afternoon around 2pm. The store is painted in modern colours and highlighted by red borders, silver accents, and completed with a granite counter for their serving area/bar. It seems like the bubble tea restaurant scene in Edmonton has vastly upped its game since I moved to Edmonton in 2006!

Their laminated menus are extremely visual, depicting the various beverages and options you can order. This chart helps you determine the price for all the fruit combinations you might want to try. For instance, if you want to order a pineapple and coconut drink you select the first fruit horizontally then find the second fruit in the vertical column and where the column and row intersect is the price (e.g. $6.50). 

Unfortunately, they ran out of blackberries that day so I ordered the small mango juice ($5) with tapioca ($0.50) while my friends ordered a small blueberry-raspberry juice ($7.00) with bubbles and avocado milk ($6.50) with bubbles ($0.50). 

In terms of taste, all the drinks were fresh with no frozen chunks or weird after tastes. The blueberry-raspberry juice had a heavier blueberry component to it rather than a 50/50 ratio while the avocado milk was the perfect blend of avocado and milk. My mango juice was refreshing as well. Not too sweet or icy.

I would definitely recommend trying out their bubble tea mainly for their fresh fruit combinations. The price point is a bit expensive when compared to other bubble tea shops in Edmonton (e.g. Dream Tea House just off Whyte Ave sells fresh fruit bubble teas for around $5.75). However, the big difference Dessert House (aka B-Tsai in Cantonese) has is their chinese desserts and snack selection. They offer up desserts such as mango tapioca with fruit, sweetened black sesame pudding and other items reminiscent of those found in Hong Kong or in Toronto or Vancouver's bubble tea/dessert houses. The Dessert House also has grilled items but on my last visit the grill was not functioning. I have yet to try their desserts and snacks as I was focused on their bubble tea this visit. I look forward to going to Dessert House when my next craving of bubble tea or snacks arise! Hopefully, their grill will be working soon! 

The Dessert House on Urbanspoon
The Dessert House
8412-109 St.
Edmonton, AB.
(780) 439-7789

Wednesday, February 16, 2011

Edmontons Best Sushi- Sushi Wasabi! My Vote for best Salmon Sashimi

     Sushi Wasabi. How can I impart upon you the greatness of this place? I think the only real way to understand why this place is incredibly tasty is for you to go and eat there. However, if you're unable to do that, let me begin with my favourite dish at Sushi Wasabi - their Salmon Sashimi. Salmon sashimi is slices of raw salmon and should not to be confused with salmon sushi which is a slice of raw salmon on a small pillow of rice seasoned with vinegar. It's believed that salmon sashimi is served the way it is (without rice) so that the person eating can taste the subtleties of the meat without being distracted by anything else.
     I can't seem to explain it but their salmon sashimi tastes so fresh! By far, the freshest tasting salmon compared to any other Alberta based Japanese restaurant I've tried so far. Try it without any soya sauce and you'll see what I mean. The nice thick slice of salmon is firm and as you bite, a slight sweetness emerges; or is that the taste of freshness? One order of salmon sashimi may seem to be slightly pricier than other restaurants, but the feeling you'll have afterwards is simply irreplaceable. You really do gain an experience in the subtleties and sometimes not-so subtle differences in raw salmon taste and texture.

Salmon sashimi - 1 full order

There are also a number of starters that you can choose from at Sushi Wasabi. One of the ones that my friend recommended was the Spinach Gomae: typically made from steamed or boiled spinach, sesame paste & of course mixed with a bit of soya sauce.
Flash fried salmon with green onions, daikon in ponzu sauce
- the ponzu sauce itself is supposed to be a bit sour so don't be put off by the taste.
Maki with tempura smelt and avocado
Maki with salmon tuna, mushroom, avocado and roe on outside
2 pieces of yellowtail (left) and 2 pieces of chopchop (right)
Maki with tempura shrimp and avocado
     There are probably a number of items on their menu, but these are the ones that I order again and again - especially the salmon sashimi. Sushi Wasabi serves up traditional Japanese food and they do it very very well! Their quality, taste and attentive service is what keeps everyone going back. Which is why it is imperative that you make reservations at this restaurant. It may seem that they have a nondescript location in a strip mall beside the Sunterra market (in Lendrum area), but this place is busy! Even if you only have two people in your party make a reservation to avoid disappointment.

Sushi Wasabi 

5714 111 Street
(780) 433-0533
Tue-Thu 5pm-9pm; Fri-Sat 5pm-9:30pm; Sun 5pm-8:30pm
closed Mondays
Sushi Wasabi on Urbanspoon

Emperor's Palace Edmonton - no go for dim sum or dinner!

     Seeing that it was Chinese New Year's recently (where celebrations continue for the entire month of February) I'm thinking that some people in Edmonton will want to check out some dim sum places. There is a new restaurant that opened recently in Edmonton's Chinatown called Emperor's Palace. Formerly occupied by Shun Fat grocery store before a fire in the butcher shop closed the entire space, the renovated area is an expansive place. With its impressive decorations, a huge and colourful photo album menu, and rumours of dim sum chefs imported from Vancouver, Emperor's Palace, for all accounts and purposes, looks like a great place to have dinner or dim sum. Sadly, this is not the case.
      We visited Emperor's Palace twice now, our first time was for dinner and the second visit was for New Year's Day Dim sum. I think the biggest sign that this was not a place to dine at was when we first walked in for dinner. There were a number of large tables of 10+ that were seated that evening, but no one was eating anything. I'm certain, it wasn't because everyone had just sat down. Plus, the restaurant was eerily quiet-which is extremely unusual for any good Chinese restaurant. Patrons were talking to one another, but since there was nothing to eat, no conversations revolved around the food. Instead, all you could hear was sighing, patrons asking waiters when their food was ready, and silence as patrons sat...waiting. One large table had sat down, waited twenty to thirty minutes before any waiting staff attended them and then left because the staff took so long to give them their drinks and tea. The food we had that night was decent, but for the mere fact that the first dish (a simple cold cut dish) took such a long time to arrive we weren't certain we would try it again.
standard dish for start of meal - this took over 1 hour to arrive!
Enoki mushrooms and veggie: not exceptionally amazing.
A bit on the salty side. 
fried rice with XO sauce - there was none to be found!
     However, we did eat there again on New Year's Day as Urban China was packed! We headed to Emperor's Palace where there was a fair number of seats available. Again, this was probably the sign we should have heeded. Once again service was slow, there were only a few dim sum carts with few of the signature dim sum dishes, and portions were incredibly small. The other rather annoying fact was that waiters constantly tried to sell you the same dishes within a very short period of time!
One of the dishes they tried to sell us again and again: bbq pork
Siu mai: a bit on the small side & slightly salty
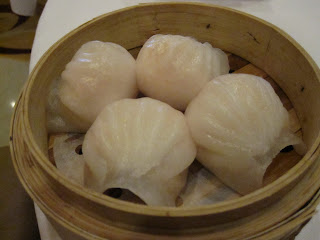
Ha gaw - This had a particularly thick skin
and shrimp inside had an interesting taste
Their one redeeming point: They didn't have a variety of
dim sum dishes (it was only 12pm), so they agreed
to make this steamed bean curd wrap for us.
     All in all, if you're hoping to eat some good solid dim sum in Edmonton I would highly suggest another restaurant other than Emperor's Palace. You may be impressed with its size and grandeur, but you'll be rather disappointed with their quality of food service. After dining here more than three times, I'm thinking you'll definitely be better off waiting and eating at Urban China. Perhaps in the future, they will improve, only time will tell.


Emperor's Palace
10638 100 St
Edmonton, AB
(780) 757-2288

Emperor's Palace Chinese Cuisine on Urbanspoon

Sunday, January 30, 2011

Big City Cupcakes - Adding another one to the mix

    I finally had a chance to try out Big City Cupcakes in Edmonton City Centre (East) Mall as I had a conference this weekend. During a break, we passed by the shop and decided to take a look at the cupcakes. I can't say my intention was to purchase one as I was simply perusing at first. Pictured below are a variety of their cupcakes.
     As you can see, they have some pretty hefty toppings and yes, those cupcakes although priced the same as other cupcake shops ($2.95) are much bigger (sorry the picture doesn't do them much justice)! While browsing, I asked, "What made their cupcakes different" from the other stores. Turns out I had the perfect people to ask, as the owners of this particular store, Sonia & Garry were in that day! Sonia & Garry were quick to give me a nice overview of their cupcakes. While they sell "regular" cupcakes their premium cupcakes are bigger in size, and some have cupcakes that are filled. All the ingredients in these cupcakes are from large brand-name baking supplies - such as Philadelphia cream cheese and are made with real whipping cream (i.e. for the ganache). I also asked Sonia & Garry, what they thought of the 'moistness factor' in these cupcakes. They were optimistic that we would not be disappointed. Clearly, Dan & I were eager to try it out as you can see Dan making a purchase in the picture below! 
     Sonia & Garry were also eager to show us some of the ice cream flavours that were now available in their store. Now you may wonder, how come they serve ice cream in a cupcake store? Well, each of the ice cream flavours correspond with most of their cupcakes. We tried a sample of the strawberry cheesecake (as this was one of the cupcakes we had purchased), a sample of peanut butter cup, another peanut-flavoured one and coconut. By far, the coconut ice cream was the winner as its smooth flavour tasted like real coconuts (I'm sure there was some measure of real coconut shavings in as well!). 
     With regards to the two peanut-flavoured ice creams: One was really interesting since Dan said it tasted exactly like peanuts (though he really liked the coconut ice cream Note: Dan isn't a normal fan of coconut-flavoured food). The peanut butter cup was a tad sweet, but I enjoyed the creamy texture of the strawberry cream cheese ice cream. This one also matched nicely with its cupcake contemporary. Another interesting fact is that all of the ice creams they get are hand mixed so real peanuts are mixed into the ice cream, strawberries, coconut etc..
     Now, if you've been to Big City Cupcakes downtown, you'll notice that they don't have room for a kitchen. That's because they have a bakery in town where all the cupcakes are made (for both locations - Kingsway & Downtown). In fact, Big City Cupcakes is originally from Vancouver. The bakery they have in Edmonton makes as many cupcakes that each location believes they need for the day and they arrive at their respective locations super fresh and moist in the early hours of the morning. Sonia & Garry also try to keep the moistness of their cupcakes to a maximum by using a closed display case - which is not often seen in most cupcake stores. Big City Cupcakes also makes cupcakes for those with Gluten Sensitive or Egg & Dairy Sensitive Diets - though I believe those are only available on certain days of the week.
     Oh and I must not forget about the cupcakes we had that day! Below, in the foreground is the Red Velvet Cheesecake with a baked in cheesecake filling topped with cream cheese icing. In the background, is the Strawberry Cheesecake with a cheese cake filling topped with strawberry cream cheese icing. In terms of moistness and density these cupcakes had it! I did find the strawberry cream cheese icing a tad sweet, though Dan enjoyed it. I liked the velvet cupcake topped with its cream cheese icing and didn't find that one too sweet. There is no crust on these cupcakes, but I don't think that was the driving point behind them. The unique aspect to these cupcakes is that they had cheesecake baked into the cupcake. Not only was this unique, but it gave the cupcakes more texture and body.
     I know that most people are saying that cupcakes are out and pies are in. However, the next time it's someone's birthday, I'm thinking it'll be more likely that I purchase some cupcakes or a cake for a friend instead of a pie. Not sure how aesthetically pleasing candles in a pie would look? Either way, I didn't get to try a cupcake with their butter cream topping, so I'm definitely slated to go to Big City Cupcakes for one of their chocolate cupcakes with some sort of butter cream topping!

Big City Cupcakes - Edmonton City Centre (East food court)
(780) 421-4263
Suite 21, 10205 101 NW St.
Edmonton, AB
Big City Cupcakes (City Centre Mall - East Food Court) on Urbanspoon