Saturday, October 29, 2011

Lemon Curd Macarons - Success!

I'm so proud of my latest batch of macarons. They are absolutely, hands-down the best batch of macarons I've made thus far! Of course, they could be better, but I'm still super excited to show them off. 
For this batch, the major differences from the Pinktober macarons was that I didn't add cream of tartar, had some pretty old egg whites (though ended up having 80g of old and needing to add in 20g of new egg white) and I hand mixed during the macaronage process. 
I am pretty certain that you do need old egg whites for a regular batch of macarons, except I was out 20g of egg white for this batch so that is why I ended up adding a fresh egg white. I think the key is that the egg whites have to be room temperature before mixing.
For this batch I followed the same recipe from Not so Humble Pie  and during the macaronage process I followed the mixing process as demonstrated by Chef Nini. The process that she describes is slowly adding your almond mixture into the egg whites in a clockwise direction. She also split her almond mixture into 6 parts; with each section taking about 11 turns. Here's what I did: 1st part= 16 turns, 2nd part = 11 turns, 3rd part = 14 turns, 4th part = 11 turns, 5th part = 11 turns, and 6th part = 23 turns. Take a look at the video for a more detailed visual. 
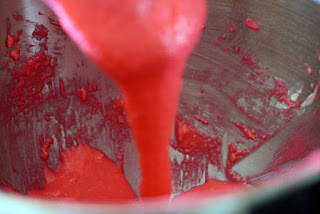
The key is to go in a clockwise rotation without going through the middle of the mixture. My theory is that by doing so you don't "crush" the air bubbles in the egg whites. Again, you want to achieve the look of magma by the end of your mixing. For this attempt, the end result was a rather thick and heavy, but "magma" like mixture as you can see from the pictures. After piping into small disks, the macarons sat out for approximately 20 minutes before putting into the oven. They were baked at 295F and baked for a total of 14 minutes; turning the tray at 7 min. 

Lemon Curd
  • 3 egg yolks (strained)
  • 1/2 cup sugar
  • 1/4 cup of lemon juice (or 1 lemon)
  • 2 ounces cold butter (approx. 1/4 cup)
  • 1/2 tbsp. grated lemon zest
  • 1/2 cup of cornstarch (mixed with a small amount of water).
Directions:
  1. Strain egg yolks through fine wire mesh.
  2. Place a bowl (could be stainless steel or ceramic) over a pot of simmering water.
  3. Whisk eggs and sugar together until well blended
  4. Add lemon juice.
  5. Continue whisking, in order to prevent curdling.
  6. Continue mixing until the mixture becomes thick (consistency should be like sour cream). This can take approx. 10 minutes.
  7. Add in 1/2 cup of cornstarch with small amount of water to help thicken the lemon curd. (note: this helped to thicken the curd, but overtime leaves a chalky texture in the macarons)
  8. Once thickened, remove from heat. Add butter, one piece at a time in chunks. Continue to stir with a wooden spoon until it is smooth.
  9. Add lemon zest and mix well
  10. Transfer mixture to a medium bowl. Cover the surface of the curd with saran wrap in order to prevent a skin from forming. Place bowl in fridge and allow it to become chilled. This can take about an hour. The curd should keep well in the fridge for up to a week. 

Sunday, October 23, 2011

Foray into Macaron Making - Pinktober Macarons


We all go through cravings/fetishes at some point in time. Some times they are shoe related, or clothing related or food related! Unlike clothing related fetishes, baking fetishes often take time and energy to perfect. You can't quite buy the item and then be content. There often is a burning desire to become competent in baking that particular item. For a while I was obsessed with making waffles as my previous post highlights. Lately, it has been the pursuit of making the elusive macaron!

After reading and researching a number of macaron recipes, I knew I was ready to start. I decided the October Mac Tweets Challenge was a good incentive. So, I spent time over the Canadian Thanksgiving long weekend for my first attempts. I also armed myself with some macaron making items in order to give my macarons their best possible chance (i.e. silpat mat, thicker baking sheet, albumen powder, aged egg whites). I also hoped to achieve the pied on my macarons. I'm not sure if you need a thicker baking sheet, but it definitely helps prevent the macarons from cooking too fast as they rise in the oven - which gives them the pied. The albumen powder (dehydrated egg white powder) gives more stability to the meringue structure so the shells will stand up better in the oven as heat is being pushed through it from the bottom. 

After two attempts (of which I'll post later), I came up with my third attempt (pictured below). With this third attempt, I followed the recipe from Not So Humble Pie. This time, though, I was able to use albumen powder as my previous two attempts only used cream of tartar. I did make one small variation by adding a pinch of tartar; and adjusting the other ratios so they would still be the same. I also processed the powdered sugar and almond meal together and sifted before mixing into the meringue. Here is the recipe I ended up using:

  • 5g dehydrated egg white powder (albumen)
  • 27g granulated sugar
  • 1g of cream of tartar
  • 225g confectioners (powdered) sugar
  • 125g almond meal
  • 100g aged egg whites

Directions:

  1. Measure and mix together albumen, granulated sugar and cream of tartar in a bowl and set aside.
  2. Place aged egg whites into mixing bowl (ensure it is perfectly clean) and begin beating egg whites on low speed until foamy. 
  3. Once egg whites are foamy (they should look bubbly and white), slowly add in mixture from step 1 and beat on medium speed (speed 5/6 on KA).
  4. Beat until a firm meringue forms. Do a check by stopping the mixer and tilting the head back to check the firmness of the peak. If a peak stays up, then you are done. Ensure that they are not stiff or foamy since that means you have gone too far!
  5. Add in food colouring (gel colouring is best) with a toothpick. Stir until uniform in colour.
  6. Add almond mixture into meringue mixture.
  7. Stir with paddle attachment on Kitchen Aid for 10 seconds then stop.
  8. Unhinge mixing bowl and stir rest with a spatula until magma-like consistency.
  9. Put batter into piping bag with large piping tip (I used Wilton 1A tip).
  10. Lay Silpat or Silicon baking sheet on baking pan.
  11. Pipe circles a little larger than a quarter coin size onto Silpat (or Silicon Baking Sheet) 
  12. Smack the baking pan against the floor with both hands to force air bubbles to the top.
  13. Poke air bubbles with toothpick.
  14. Let it rest for 30 minutes (I discovered this varies with humidity, on a really dry day you only need 15 minutes) until skin forms on the macaron surface.
  15. Preheat oven to 290F (this temperature depends on the size of your macarons and type of oven, I have a standard NON-convection oven).
  16. Place the baking pan into the oven and set a timer for 7 minutes.
  17. At 7 minutes, rotate the baking pan (this is to try and get even heating for all the macarons. Some instructions have said you should create a tent above the baking pan to prevent browning but did not seem necessary for my oven.
  18. After another 7 minutes, I rotated the pan once more and baked for 1 more minute.
  19. Let it cool on the baking sheet before removing from baking sheet. 
Here are my Macs for the Mac Attack #24 Pinktober Macarons 

Strawberry Jam Buttercream

For the buttercream recipe, I used a Swiss Meringue Buttercream recipe. Since the buttercream recipe makes a massive amount, I cut it down to the following amounts using the same technique. 

  • less than 1/2 cup of sugar
  • 1 egg white
  • 1/2 cup of butter
  • 3 1/2 tbsp (50 grams) of strawberry jam

 So there you have it, my first successful foray into the world of macarons - Strawberry Jam Pinktober Macarons!


Wednesday, October 19, 2011

Waffles, Waffles, Waffles!

Over the past year, I have been extremely addicted to waffles! At every farmer's market I would hunt down the Eva Sweet Waffle truck, order waffles at Culina Highlands, and check out the other waffle trucks such as Wanda's Waffle. The sort of waffle I was craving for was the round Belgian style waffle that was crispy on the outside, air pockets on the inside and slightly sweet for taste. After numerous variations of different waffle recipes and using 2 different waffle irons I have now come up with a good working waffle recipe that creates exactly what I'm looking for! The added bonus is that this recipe is super easy to make. It is slightly on the runny side after mixing, but this is needed to create the crispy shell.
Classic Belgian Waffles (makes approx. 8 large waffles)
1 1/2 cups (395 ml) water
2 1/4 tsp (11ml) active dry yeast (or 1 packet)
3 cups flour (sifted)
1/4 tsp salt
3 large eggs, separated and 1 egg white
1/3 cup (75 ml) sugar
1 1/2 cups (375 ml) whole milk (I used 1% for this recipe)
8 tbsp unsalted butter (melted & cooled) 
2 tsp vegetable oil
2 tsp vanilla extract
Directions:
1. Heat 3/4 cup of the water to lukewarm. Safe the rest of later.
2. Dissolve the yeast. Add a pinch of sugar (You can also use honey or maple syrup).
3. Let stand for 5-10 min until foamy in a draft free place (i.e. microwave/toaster oven)
4. In a large bowl sift flour and salt, stir & blend. Set aside for later.
5. When yeast mixture is foamy, add egg yolks, one of the egg whites and rest of sugar to the yeast mixture. Add the rest of the water, milk, melted butter, oil, vanilla. 
6. Stir yeast mixture until smooth (I use the KA to complete step 5).
7. When yeast mixture is smooth, add flour to yeast mixture. Stir until smooth.
8. Beat egg whites until stiff peaks form. Fold into yeast mixture.
9. Let batter stand for 1 hour. Stir every 15 minutes. (You can cover with a cloth or saran wrap. The batter will start rising in the first 10 minutes).
Making the waffles:
1. I am using a Cusinart rotating waffle maker. I've found that placing it on setting 7 gives the waffle a nice warm golden colour.
2. Add approximately 1/2 cup to the waffle iron. Spread mixture. Close iron and turn. If the batter starts bubbling out the sides of the iron, try using less batter on your next waffle.
3. When the waffle iron beeps, flip waffle iron back over and remove waffle.
4. Place on cooling rack.
These waffles are easily frozen, and will stay good for over 2 weeks. Chances are you won't have them in your freezer that long! I usually make a batch and freeze 4 waffles in a large freezer bag. I usually eat my waffles in the morning by lightly toasting in the countertop oven (though we've also have them for supper at times!). My waffles usually enjoy a variation of toppings such as maple syrup, fruit, strawberry jam, chicken stir-fry or whatever your heart desires.