Wednesday, March 28, 2012

Kitchen staple - Warm Chocolate Chip Cookies


After all the intense baking I've been doing pursuing my love of macarons, I decided to go back and bake some plain chocolate chip cookies (mainly because all I wanted one night was a nice warm chocolate chip cookie with a glass of milk). By far, these are probably the easiest baked goods I've done in a while! Taking no longer than 15 minutes to prep, another 10-12 minutes to bake and 1 minute to eat a piping hot chocolate chip cookie!

Here's what you'll need (recipe adapted from Chef Michael Smith's - The Best of Chef at Home):
  • 1 1/2 cups of all purpose flour
  • 1 teaspoon of baking powder
  • 1/4 teaspoon of salt
  • 1/2 cup (or 1 stick) of butter, softened
  • 1/2 cup brown sugar 
  • 1 egg
  • 1 tsp pure vanilla extract 
  • 1 cup chocolate chips 

Baking notes:
  • recipe calls for 1 cup of brown sugar. I used less as I prefer cookies that are less sweet. Plus, there is already the addition of chocolate chips that adds to the sweetness
  • vanilla extract: Crucial to use the real stuff as it makes a huge difference in taste
  • Chocolate chips: instead of using the chips, I used 70% dark Valrhona Araguani chocolates that hand cut into chunks (tastes amazing!)
Directions:
1. Whisk flour, baking powder & salt together and then set aside. 
    Preheat oven to 375F (190C)


2. Cream the butter & sugar together using a stand mixture, food processor
or simply beat by hand. 
3.Add the egg & vanilla and continue beating until it is all combined. Scrape down the bowl. Then, gradually add the flour mixture (baking powder, flour & salt) until all
ingredients are combined.

4. Hand cut 70% dark Valrhona chocolate. First, cut a cup of chocolate chips,
then stir into the batter.
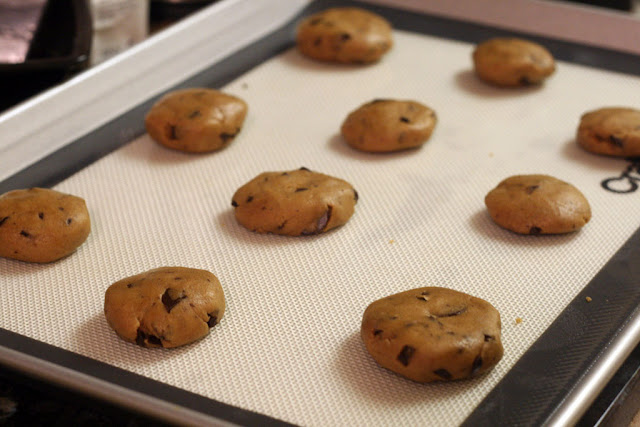
5. Roll a small ball of dough between your hands, then flatten
to make a cookie. Leave lots of space between
each cookie in order for them to expand.

notes:

  • Soft chewy cookies ~ bake for approximately 10-12 minutes
  • Crispy cookies ~ bake for a minute or two longer (depends on your oven temperature). 
  • makes about 18 cookies
Enjoy your fresh cookies! Or the next day, gently
re-toast the cookies in your toaster oven for a few minutes to recreate the 'just-baked' cookie effect.

Wednesday, March 14, 2012

My Pierre Hermé inspired Ispahan Macarons


This post is in celebration of Macaron Day on March 20! This month's Mactweets challenge is to create something new and worthy of a party. I had just received a copy of Pierre Hermé's book, Macaronsfrom the local library so I was super enthused to try my hand at one of his famous macarons! After much thought, I decided on his Ispahan Macarons. His original creation has lychee, rose & raspberry with a white chocolate ganache. The one I created, has a dark chocolate-lychee ganache with a raspberry jelly inside. 

I must say that the creation of this macaron took longer than expected (about 5 nights of work)! First, is the creation of the raspberry jelly, then the pink sugar, the chocolate-lychee ganache (and waiting for it to set), the creation of the macarons shells and finally the assembly of the Ispahan macaron. 


So, the question on your mind may be: What does it taste like? 
Well, this macaron does not fail in creating a party in your mouth! At first bite, it is chocolately, then a clean lychee flavour emerges. Once you bite into the raspberry jelly, a raspberry note appears & combines with the rest of the flavours. Certainly a nice fruity-chocolate combination. It can also be described as a "chocolate-fondue party" in your mouth!

120g canned lychee puree mixed into 30g hot whipping cream
and then poured over the melted chocolate (~205g) to create
the chocolate-lychee ganache

210g of pureed & strained raspberries combined with 17g caster sugar
and 2g Knox gelatin to create a raspberry jelly. Best to
freeze for 2 hours, and then cut into desired squares. 

Raspberry Jelly placed onto a dollop of ganache.
Be sure to place another drop of ganache on top
before assembling macaron.
Macaron shells were dusted with pink sugar prior to being baked in oven (simply place a drop of food colouring into sugar, mix well & allow to dry) 

Certainly ready for a party any day with these pretty pink & shiny macarons! 


Happy Macaron Day - March 20!!!!!!


Tuesday, March 13, 2012

Step by Step Matcha Green Tea Macaron Goodness Recipe

You can certainly never go wrong with using matcha (also known as green tea powder) in your macarons. For this batch of macarons I ended up doing it twice as the amount of matcha powder was just not enough the first time around. If you want intense matcha flavour, blend the powder into the body of your shells as well as infusing it into the buttercream. 
Here's the matcha green powder that I finally managed to find (in Edmonton). This little tin cost $8 and according to the lady at the Chinese tea place, even a little teaspoon is packed with intense flavour and "is potent". Needless to say, I wanted to try out what she meant by 'potent' and went for 6g of the matcha powder grounded into the shell, and 2tsp for the buttercream.  

The ingredients and instructions for making these macarons are the same as what I've been baking lately (Macaron 101 tutorial series). Just note the changes for the amount of matcha powder you will need for the buttercream and for the shells. 


Matcha Macaron Shells

Ingredients

  • 5g of Dehydrated Egg White Powder (also known as albumen) 
  • 28g of Granulated Sugar
  • 6g matcha powder
  • 205g of Powdered Sugar (also known as icing sugar)
  • 125g of Almond Meal
  • 100g of Aged Egg Whites (2-3 days in airtight container at room temperature)

Buyer's notes:
  • If you're in Edmonton. You can purchase Albumen/Dehydrated Egg White Powder at Barbs Kitchen Centre.
  • I purchase my almond meal from Bulk Barn. They often have coupons where if you spend $10 you get $3 off. The key is spend right up to $10 to get the most out of the discount.
  • Matcha powder (also known as green tea powder) can be purchased at this little tea shop around 97st & 34 ave or T&T grocery market. I have also seen it at most Korean stores. There are a few Korean stores in Edmonton that I frequent. Two of them are in Millwoods- Korean Central Market at 9271 34 Ave NW and Korean Japanese Food and Wares at 3116 Parsons Road NW. In the Donnan/Bonnie Doon area there is L & K Oriental Foods and Imports at 7743 85 St NW. 
  • For more information about equipment and ingredients take a look at my Macaron 101 post.

Directions:

  1. Measure all ingredients with a scale.
  2. Process the almond meal, powdered (icing) sugar and matcha powder in the food processor. Sift everything through a fine mesh. If there are any large lumps of almond meal, process it again. 
  3. Attach whisk to the stand-up mixer and place 100g of egg whites into the mixer bowl. Whisk at a low speed (2 on my Kitchen Aid).
  4. When egg whites are foamy (mousse-like) add in the dehydrated egg white powder (albumen) and granulated sugar mixture.
  5. Add in two drops of gel food colouring (I used Wilton Green Leaf gel food colouring). If you want a darker colour add more now as the colour of the shells will lighten in the oven.
  6. Increase speed on Kitchen Aid to 4. Beat egg whites until "soft peaks" form for the meringue. To test if the meringue is at the correct stage, do a check by stopping the mixer and tilting the whisk back to check the firmness of the peak. If a small peak forms on the end of the whisk, then you are done. Ensure that the meringue is not too stiff or foamy since that means you have gone too far. You have now made the "meringue" stage of the macaron.
  7. Slowly incorporate the almond meal sugar mixture, by mixing 2 tablespoons at a time to the meringue in a clockwise direction. For a visual demonstration of the mixing technique, see this video clip.  Note: I found that splitting the mixing into six parts (with each part being approx. 2 tablespoons) and mixing a certain number of turns helps to achieve the best macaron shells.  This step is probably one of the most crucial steps in making macarons; also known as the macaronage process.
    Beyond Umami's Macaronage Mixing Guide
    1st part = 16 turns
    2nd part = 11 turns
    3rd part = 14 turns
    4th part = 11 turns
    5th part = 11 turns
    6th part = 23 turns
  8. Once mixture feels and looks like magma (flows slowly)transfer to a piping bag.
  9. Prepare the baking sheets by lining either silicon mats or parchment paper.
  10. Pipe each macaron shell by piping small circles (See video clip for demonstration of piping).
  11. Firmly rap tray on the floor or counter to get rid of any air bubbles inside the shells. This is called "tamping".
  12. Use a toothpick to pop any air bubbles from the surface of the macaron shells. (See video for further explanation)
  13. Allow the trays of macarons shells to rest for at least 30-45 minutes in a draft-free place until a skin forms on the top of the shell and it is dry to the touch. 
  14. Preheat oven to 270-295 degrees Fahrenheit. Temperature will vary depending on your oven (see baking notes below). 
  15. Put one tray in the oven and bake for 20-30 minutes. Bake trays one at a time. 
  16. Take out of oven, allow the macarons to cool.
  17. Gently, peel the shells from the mat.
  18. Match macaron shells by size, then pipe a small mound of matcha buttercream onto each half shell (Here's a quick visual tutorial on piping bag basics). 
  19. Top with the remaining shell and give a slight twist to secure the macaron together.
Oven Notes
  • Oven temperature may range from anywhere 290 to 300 depending on your oven. Best practice is to pipe a few macarons and test at various temperatures and times in the oven.
  • The temperature that you bake your macarons at may depend on what type of oven you have.If baking in a regular oven at 295F put one tray in the oven and bake for 10 minutes, then rotate the tray (by now the feet should have formed) and bake for another 10 minutes.
  • If baking in a regular oven at 270F (which is what I've been baking my macarons since I moved), bake the shells for 30 minutes one tray at a time. If baking in a convection oven, preheat your oven to 280F and bake for 12-15 minutes. They will be done when there is a firm crust on the top and the sought after ruffled edge; otherwise known as the pied (feet in French).
  • I discovered that it's optimal to not have more than 20 large macaron shells (or 30 medium shells) on a single tray.
  • Use a thick and heavy-weight baking tray for optimal results.


Matcha Green Tea Buttercream 

Ingredients

  • 1 tbsp Matcha Powder
  • 1 tablespoon of hot water to dissolve powder 
  • 80g (approx. 1/2 cup) superfine sugar
  • 25g water 
  • 1 whole egg 
  • 1 egg yolk 
  • 160g soft butter (cut into cubes) 
    Directions:

    1. Bring sugar and water to a boil in a small pot. Heat the sugar to 250F(120C) using a candy thermometer. If it boils, clean the sides of the pan with a damp pastry brush. Try not to mix the solution, but allow it to heat on its own.
    2. In another bowl or the bowl of your Kitchen Aid whisk the eggs and egg yolks until it lightens in colour.
    3. Once the hot sugar mixture reaches 250F pour immediately into the whisking egg mixture. Then, increase to a higher whisking speed. Continue whisking until the mixture has cooled down completely. It will start to look like a meringue and be glossy.
    4. Keep whisking the meringue until it has cooled. Meanwhile, cream then whisk the butter until it has thickened. Once the egg mixture-meringue has cooled, add the butter. Add the whisked butter slowly into the meringue.
    5. Continue whisking until the buttercream is smooth. It may curdle slightly but this is okay. Keep whisking and the buttercream will come back together. Take a look at this video for making a buttercream (in the video I am making pumpkin spice buttercream but you can still follow the video with the instructions below).
    6. Dissolve the matcha powder in the hot water. Mix well.
    7. Slowly add the matcha powder solution (when cool) to the buttercream. 
    8. Continue whisking the butter and matcha powder solution. The buttercream may look wet; but keep on whisking.
    9. Once everything is combined and looks like buttercream (1-2 minutes); switch to the paddle attachment. Beat on low speed for a minute in order to eliminate air bubbles.
    10. Scrape down the sides of the bowl with a spatula. Continue beating until the buttercream is smooth.

    notes: 
    • the first time I did this, I used only 1 tsp of matcha powder. That was certainly not enough! To get more of an intense flavour (and colour) try using at least 1 tbsp. 
    • You can dissolve the matcha powder in up to 2 tbsp of water, but I found that this took longer for the buttercream to set as it was more wet. It's also important to allow the dissolved matcha powder solution to cool before adding to the buttercream. 
    • Superfine sugar can be made by taking granulated sugar and processing in a food processor.
    See the colour difference between adding more or
    less matcha powder in the shell and buttercream?


    Monday, March 12, 2012

    Eat Alberta 2012 - April 14, 2012!


    Super excited to share with everyone about the 2nd annual Eat Alberta 2012 taking place on April 14, 2012. This conference is not like any other where you sit back and listen BUT it is a DIY conference! You have the opportunity to get hands-on with learning the intricacies of making sausage, cheese, bread, french macarons, and pasta to name a few. All of these sessions will be hosted by Edmontonians passionate about their food and sharing their experiences through their workshops. For instance, Connie Nelson from Mirabelle Macarons will be presenting on the makings of the elusive macaron. 


    There will also be tasting sessions such as honey, cheese, fruit wine & of course beer!  Opening keynote will be by Danny & Shannon Ruzicka from Nature's Green Acres Farms. Kevin Kent  will be presenting on his passion (knives) and Martin Orsis will be presenting sessions on foraging for wild food! 


    For further information about speakers, DIY sessions, and registration please go to http://www.eatalberta.ca/. Check out the schedule here or to take a look at the list of presenters


    Registration for this conference goes live Tuesday March 13,2012 @ 8am!