Monday, December 29, 2014

So Gouda! Artichoke Appetizers


Christmas 2014 is over, but the New Year is just around the corner! I made these filled artichoke hearts topped with gouda for Christmas Day appetizers and I am sure they will do well for upcoming New Year events and parties! 

For this post, I teamed up with my friend Michelle from The Tiffin Box and Dairy Farmers of Canada (DFC). The DFC provided me with the ingredients to try out one of their recipes from their Winter Warmth Collection titled "Exotic Artichokes with Gouda". 


I really liked the use of fresh herbs for the recipe. I am admittedly not a fan of parsley but with the combination of the fresh mint and dill, I barely noticed! 


In addition to the fresh herbs, the recipe calls for rice, chopped walnuts, seedless grapes, honey and shredded gouda for the topping. 


After all the ingredients are prepped, toss them together in a bowl. You can also place the filling into an air tight container in the fridge until you are ready to assemble the appetizer. I made these for Christmas dinner so I prepared all the ingredients mid afternoon and had the filling sitting in the fridge. Once guests arrived, I topped the artichoke hearts with the filling. I also added a few more gratings of gouda before serving. 


At first, I did have a little trouble topping the artichoke hearts with the filling as very little could be placed into each one. Then, Dan's Dad came to the rescue and suggested slightly pushing the artichokes hearts in to form a deeper vessel for the filling. This seemed to help a lot! We also attempted to cut down the artichoke heart but this resulted in extra artichoke pieces left over and the vessel falling apart completely. 

Overall, all the ingredients worked well together. I would suggest using less honey as the grapes were already quite sweet. I also used a Korean short grain brown sticky rice since that was all we had in the pantry. I am also thinking that getting artichoke bottoms next time would make the assembling of the appetizer much easier. 

So, head on over to the Dairy Farmers of Canada website to download the recipe and explore other recipes with cheese.  

Then, click on Exotic Artichokes with Gouda for the ingredient list and directions. Come on back to ask me any questions if you need! 

Also, remember to check out Michelle's post on her take on the Mediterranean Ricotta Cheese Fritters.

Disclosure: While Michelle and I were provided with the ingredients for our recipes, we were not compensated monetarily for our posts. 

Tuesday, December 23, 2014

Kimchi Roasted Cauliflower


You have probably been reading about how cauliflower is the "new" vegetable to cook with. Or, maybe it is what all the food websites that Dan and I have been reading are telling us. So, of course we needed to try out a recipe to test this theory of how cauliflower is the 'it' vegetable. 

This recipe is inspired by a recipe from the Thug Kitchen Cookbook. There is no frying of any kind which makes this cauliflower dish truly healthy! By adding in the kimchi, it reminds me of a dish from an exciting restaurant in Edmonton called Tavern 1903 (which recently closed) called KFC - Cauliflower Fried Chicken.


Feel free to adjust the spice level to your preference. The kimchi we used in this recipe was one that we had made with friends about a month ago. 1 head of cauliflower is good for 3 to 4 people.

Ingredients

  • 1 Head of Cauliflower
  • 1/2 cup of Flour
  • 1/2 cup of water
  • 1/2 teaspoon of baking powder
  • 1/2 teaspoon of salt
  • 4 tablespoons of kimchi

Instructions

  1. Preheat oven to 375F. Cut up the cauliflower into finger-length chunks.
  2. Start making the batter by mixing flour into the water as this helps to avoid clumps. Once flour is mixed in, add in the baking powder and salt.
  3. Coat the cauliflower pieces with the batter.
  4. Pour the coated cauliflower onto a baking sheet lined with parchment paper.
  5. Bake for 15 minutes at 375F.  Then, set the oven to broil and bake for another 5-10 minutes, until you have your preferred level of browning.
  6. Take the tray out of the oven and gather the hot cauliflower into a pile. Then, slowly mix and fold the kimchi into the cauliflower pile.
  7. Serve immediately. 
We also ended up grating some pecorino romano onto the dish afterwards and it worked perfectly! A friend of ours also thought sprinkling some furikake and toasted sesame onto the dish would work nicely too.

Let me know what you added to your dish in the comments below. 


Sunday, December 21, 2014

Homemade Candied Cranberries Step by Step


Bowl of homemade candied cranberries that look like ice-frosted berries.

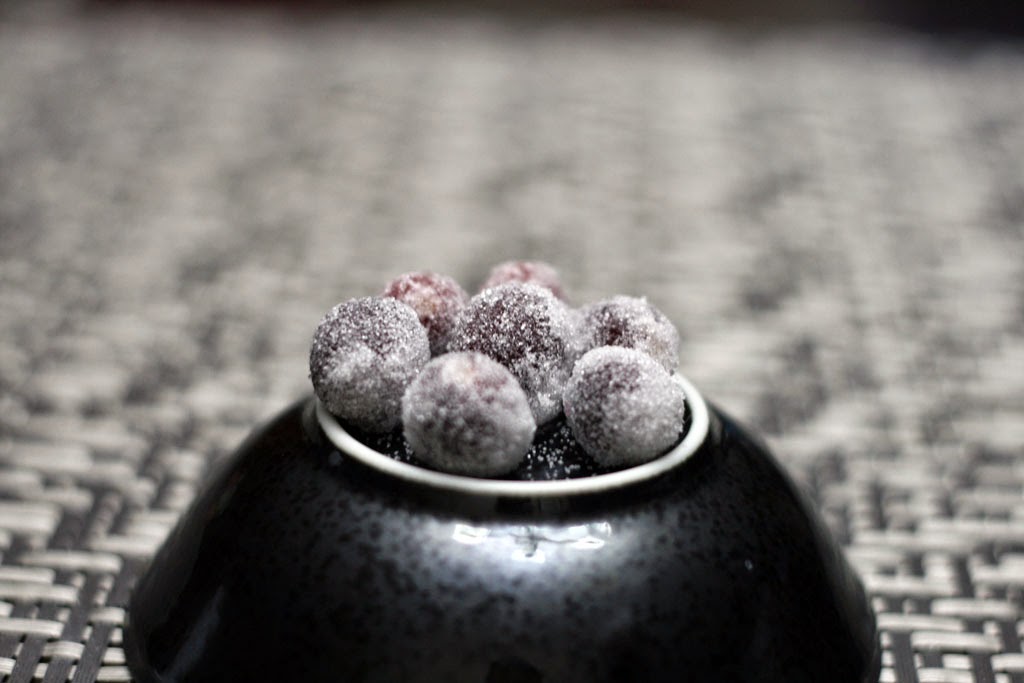
Here are some neat treats to make for others, to serve at gatherings or to bring to potlucks that we have been making. These are essentially "raw" cranberries that have been candied. Think of them being a cranberry center with a crispy sugary shell.

I brought some of these to a work potluck and they were very well received! So, here is the recipe as even those that don't bake can make these creations! 

Ingredients

  • 2 Cups of fresh (never frozen) Cranberries
  • 1 Cup of Water
  • 1 Cup + 1/2 Cup of Sugar
  • 1 teaspoon of lemon zest

Mise-En-Place: A cup of fresh cranberries, a cup of sugar, and a cup of water.
*We bought our fresh, never frozen cranberries from Costco! They had the best looking cranberries around!


Instructions

  1. Create the simple syrup by pouring water and 1 Cup of sugar into small pot. Add lemon zest to pot. This will will help add more dimension to the flavour. Heat mixture until sugar has dissolved into boiling water.
    Pouring a cup of sugar into a small pot.

    Pouring 1 cup of water into the same pot as the sugar.
  2. Let the mixture cool for 10 minutes. Add cranberries to the simple syrup.
    Pouring a cup of cranberries into pot.
  3. Cool the cranberries in the syrup until room temperature. Put cranberries and syrup into air-tight container. Rest in the fridge for at least 8 hours or up to 48 hours (2 days).

    Two cups of fresh cranberries inside a mason jar containing simple syrup.
  4. Strain cranberries out from syrup - this same syrup can be reheated and reused again. Let cranberries dry for about 5 minutes.

    A plate of red cranberries coated in simple syrup.
  5. Put 2-3 tablespoons of sugar into a small dry cup. Placing one cranberry in at a time, roll the cranberry in the dry sugar. If you add too many cranberries at once you'll get clumping.
    A cup with some granular sugar and a single cranberry rolled in the sugar.

    An inverted bowl displaying seven sugar frosted cranberries.
  6. Keep the candied cranberries in an air-tight container in the fridge. It should keep for a few days in the fridge before getting soft. Alternatively, you can package them off as gifts in an air-tight container.

    A bowl of candied cranberries.
Hope you enjoyed these candied cranberries!


Saturday, December 6, 2014

Salted Chocolate Chip Cookies


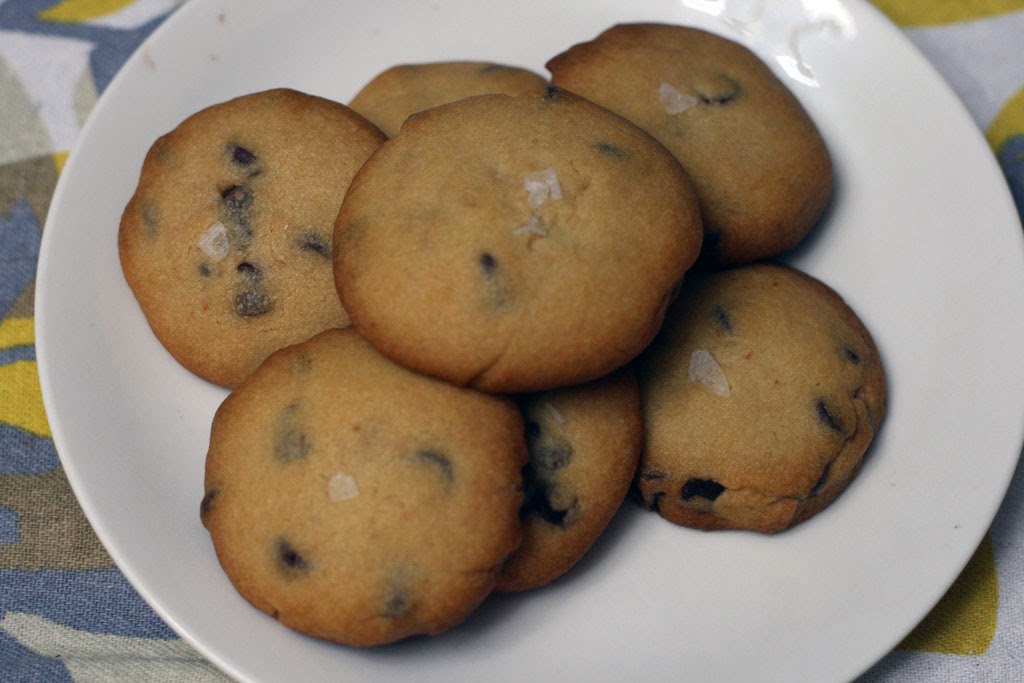
Salted chocolate chip cookies from BeyondUmami
The above picture represents the end result of me baking three different batches of salted chocolate chip cookies over a period of a week. Yes one week! Thankfully we didn't eat them all ourselves as we had people over for dinner and I dutifully brought them with me to potlucks, work meetings and get-togethers. Back in November, I was on a search for a chewy salted chocolate chip cookie that has a slightly crispy outside.  

Two different cookies, two different recipes.
I tried various butter to sugar ratios, different sugar amounts, sugar-butter whipping methods, baking soda vs. baking powder and even baking times. I charted everything! 


Flour to butter ratio and rising element were the main differences in these two cookies.
The one on the right was almost cake like due to the large amount of flour, while my current recipe (left) gave me what I was looking for - crispy outside & chewy insides. 
The recipe of the cookie that I am most happy with is depicted visually step-by-step below. Let me know in the comments below if you have a particular chocolate chip cookie that you enjoy and why.

Beyond Umami's Chewy Salted Chocolate Chip Cookies

Ingredients
  • 1/2 cup butter
  • 1/4 cup white sugar
  • 1/4 cup turbinado sugar
  • 1/2 cup packed brown sugar 
  • 1 1/2 cups flour
  • 1 teaspoon baking soda
  • 1 teaspoon of salt 
  • 1 egg
  • 1 teaspoon vanilla extract
  • 1 cup chocolate chip or chocolate chunks chopped
  • good quality salt for topping


Directions:
  1. Measure all the ingredients. Combine white sugar, turbinado sugar and brown sugar together. In a separate bowl combine flour, baking soda and salt together.
  2. Place butter and sugars into the bowl of a standup mixer with the paddle attachment.
  3. Cream butter and sugars together on medium-high speed for 10 minutes. It should look very fluffy.
  4. Add in the egg and continue mixing with the paddle attachment. Once the egg is incorporated, add in the vanilla extract.
  5. Slowly add in the flour, baking soda, salt mixture with the standup mixer running on low. Once all the flour is in the mixer turn the mixer back up to medium (~6)
  6. This is what the cookie batter should look like.
  7. Turn the mixer off and remove from stand. Fold in the chocolate chips or chocolate chunks with a spatula.
  8. Once all the chocolate is mixed into the dough, measure out 20g balls of dough with a scale. This helps to make consistent size cookies that will all bake at the same time. Flatten each ball of dough onto a lined cookie sheet. Top with a good quality salt. In the picture below I used pyramid salt crystals.

    Bake at 375F for 12-13 minutes. They should be slightly browned on the outside and slightly chewy on the inside. Transfer to a baking rack to cool or pop one into your mouth for immediate taste testing.
Let me know if you try making them and what you like in a good cookie. 

Wednesday, November 19, 2014

Duchess Bake Shop Memories and a Giveaway


A close up shot of Duchess Bake Shop's mini Paris Brest.
Mini Paris Brest Pastries from Duchess Bake Shop.

Duchess Bake Shop is our favourite place for fine French baked goods and pastries in Edmonton. Dan and I have visited since Duchess opened, and have brought many friends, family, and out of town guests for a taste of France in Edmonton.

Back in 2009, Dan and I had been attempting unsuccessfully to make macarons in my small galley kitchen. When Duchess opened in October 2009 to great fanfare, we were very keen on visiting specifically because of their macarons. We learned that one of the owners, Giselle, had become fascinated with macarons while in Japan and had spent time perfecting the homemade macaron. This inspired me in my pursuit of the elusive homemade macaron. If you've followed along in my journey, you would definitely see all the different macarons I've baked.
Behind the counter at Duchess Bake Shop in 2010 


Even though we visited Duchess many times over the following months, it played a special part during a memorable day in May of 2010. We were invited to an exclusive behind-the-scenes look at what happens in the kitchen before the doors opened. Little did I know that the invitation was just part of a series of special surprises Dan had planned before he proposed to me!


Behind the scenes in Duchess' kitchen in May 2010.

Dan & I in Duchess in 2010 (we look so young!)
As many of you may have heard, Duchess released their self-titled cookbook last Wednesday (November 12, 2014). This cookbook resonates with me not only because there are beautiful pictures accompanying the step-by-step instructions, but also, this is the first cookbook where I've tried every item!
A mountain of Croquembouche wrapped in spun golden sugar threads.
A tower of croquembouche at the cookbook launch!
A tower of Macarons.
Giselle Courteau explaining the Duchess Bake Shop Cookbook.
Giselle Courteau at the Duchess Bake Shop cookbook launch.
Giselle has generously given two signed copies of Duchess' cookbook as a giveaway for two lucky readers! This giveaway is only open to readers who live in and around Edmonton or in Calgary. If the winner(s) resides in Calgary or area you must be able to meet with me in Calgary on either Saturday November 29, 2014 or on Sunday November 30, 2014. Arrangements will be made if the winner(s) live in Edmonton or greater area.

You can also purchase their cookbook in Edmonton at Provisions or online. Good luck to everyone and I look forward to reading your bake shop memories.

Monday, November 17, 2014

Made in Blog Awards 2014


Hello everyone! The Made in Blog Awards 2014 is here! The Made in Blog Awards are all about promoting Canadian bloggers, so it is a great way to look out for new blogs and content in a range of different areas! If you have the time, please do me a big favour and click on this link HERE, to vote for me in the "Cooking" category. All you need to do is click the blue "Vote for Me +1" button. No registration is required and anyone can vote. You have until November 26, 2014 to vote. After that all blogs with the most votes are then judged by a panel. Thanks so much for the support and I really appreciate it! 


Thursday, November 13, 2014

Easy Crustless Quiche Recipe & A Giveaway!


When my husband and I made the Taiwan Red Bean Wheelcakes back in September, we were trying out various recipes that could be used on the Nordic Ware Eggs Plus Pan. One thing that you should know about my husband is that he is a huge proponent on ensuring that every single one of our kitchen gadgets must not be single function kitchen tools (with the exception of a can opener). This means that any kitchen gadget that lives in our kitchen must be able to be used for different recipes. 

The first recipe we made with the new pan was actually not the Taiwan Red Bean Wheelcakes but instead Crustless Quiches!


So below is the recipe for the Crustless Quiches. Make sure you read all the way to the end for exciting details on how you can win the Eggs Plus Pan for yourself!

Crustless Quiches

Ingredients
  • approx. 1 cup of milk
  • 4 eggs
  • 3-4 filling ingredients such as tomatoes, onions, cheese, spinach etc.. The sky's the limit!

Directions:

  1. Dice up all the ingredients into smaller pieces as the quiche cooks fairly quickly.
  2. Beat eggs and milk together in a bowl. Transfer the filling to a bowl with a spout and pour the egg mixture about half-way up each reservoir. Oiling each reservoir beforehand is optional (the pan is non-stick).

  3. Once the egg mixture begins to cook, slowly add fillings to each crustless quiche. You can even put different fillings in each one and customize to everyone's preferences!
  4. Cook the crustless quiches on medium for about 10 minutes, or until the tops are cooked and the egg is no longer runny looking.
  5. Using a silicon spatula gently loosen the quiche from the pan and serve onto a plate.

We tried putting the top on the pan initially, but realized that this would soften the quiches as the pan begins to cook with steam. If you want crispy quiches, leave the top off.
It goes without saying that having individual quiche creations is great. However, you could easily use the pan for multiple uses such as making two crustless quiches, a sunny side egg and sausage all in the same pan. The pan also has a little pamphlet that comes with further ideas on how to use it.

Or, you could always make the Taiwan Red Bean Wheelcakes from my previous post!


Giveaway!

Now for the eggciting part of this post! Nordic Ware has given me an Eggs Plus Pan to give away to one lucky reader! This pan will be shipped directly to you from Nordic Ware and is open to Canada and the U.S! Enter the giveaway in the Rafflecopter below with your details. Make sure you leave a comment as that is the minimum requirement for entering the giveaway. Good luck!

Prize: One (1) lucky reader will receive a Nordic Ware Eggs Plus Pan.

Duration: Giveaway will be open until November 30, 2014.

Who Can Enter: Open to residents of Canada and the USA.

How to Enter: Please follow the instructions in the rafflecopter below. Remember that leaving a comment is mandatory.

How will the winner be chosen: The winner will be chosen at random and will be notified via email. The winner will have 24 hours to respond or a new winner will be chosen.