Friday, March 20, 2015

Macaron Day 2015; Reasons Why I Started Blogging

Today, marks Macaron Day 2015! Who would have thought I would love these beautiful french desserts so much! Not only are they pretty to look at but the satisfaction that I get from making a batch of these is incredible. 

When I think about macarons, I also think back to where my blog started. Or more like, how it wouldn't have started had it not been for the encouragement of Dan and local Edmonton food bloggers (Sharon from Only here for the Food, Val from A Canadian Foodie to name a few) during my first food tweet-up back in 2010 at Edmonton's first Famoso Pizza!  Within a year, my fascination with macarons went from purchasing them from French bakeries, to attending a Macaron Mashup, to making them myself.


The macarons I blogged & baked back in 2011were not always stellar as Dan brought many a "maca-wrongs" to work for his coworkers. Over time, though, I became more and more interested in learning how to bake better macarons. Not only did I bake macarons every Thursday for the better part of a year, but I developed a charting system to track the macaronage process, resting time and even the optimal oven temperature! As some of you have experienced, making macarons is not an easy process but it's definitely a craft. Though not always fun and sometimes even frustrating, for me, the journey to making better macarons has been pretty rewarding! I can't wait to show you all some of the new macarons, shapes, and fillings we have in mind.


So, today I want to wish everyone a happy Macaron Day 2015 and to encourage everyone to follow their passions. If you blog, think back to why you started blogging. For me, I started mainly to share the food I was cooking at home, the restaurants I went to, and food events with family and friends back home in Toronto. Today, I continue to share new macaron recipes, as well as recipes that my husband and I have been making at home to share on the blog. I also realized that I love showing the process to how food is made - pictures with instructions mean so much more to me! I continually strive and hope to continue that in my blogging. Without which, I don't think blogging would be as enjoyable for me.
Tuesday, March 10, 2015

Edmonton Coffee Week - #yegcoffeeweek


Have you heard? If you are in Edmonton, this past saturday marked the first Edmonton Coffee Week running from March 7-15, 2015. 


For the next few days there are several participating coffee shops and events all featured around coffee! Now, I for one cannot live without coffee! So, who doesn't love learning about how to make latte art and all the beautiful creations that could be made on those mochas, lattes, and chai teas? So, I was super excited when the opportunity came up to learn some latte art from François at Cafe Bicyclette. 


Before we even get into the latte art, you need a shot of espresso. Make sure you get the right grind on your espresso (not too coarse and not too fine). Once the espresso grinds are piled up in the portafilter (like the photo below), you tamp it evenly.


Fit the portafilter into the espresso machine (there are grooves to guide) and make sure it is tight. Too loose and espresso will go everywhere - which is apparently not a pretty sight! Also, ensure there are no coffee grinds in the espresso cups before running the espresso through.


Once the espresso is done, pour them into your cup. Then, pour the cold milk into the milk frothing pitcher. François did mention that using whole milk is slightly better as it helps to give a nicer look to the latte art. Plus the milk stays creamy.


Heating the milk was the tricky part for me. You had to make sure that it didn't overflow or get too hot. Once the milk frothing container is hot to the touch than it is done. Using a milk thermometer probably would be helpful as you are learning to ensure that the milk isn't burnt.
 

Now, the part everyone wants to perfect is the actual latte art! You do need to multi-task as you need to quickly wipe down the milk steamer while swirling and tamping the hot milk to get the bubbles out so it will be creamy. When it comes to pouring the hot milk into the cup with the espresso, there should be no hesitations! Below, is my attempt at a heart or more like a heart shaped balloon!


So, it was without a doubt a fun hour introducing me to latte art! I think practice would make perfect! And, clearly that was a great latte as I am wired enough to write this post at 12am. Hopefully there will be more opportunities to learn about latte art in the future. In the meantime, I might try watching Chef Steps - Latte Art to hone this skill. 

If you have a chance, check out all the other Edmonton events for YEG Coffee Week or visit a local coffee shop for a latte or two! 

Couldn't leave without buying this amazing pain au chocolat to have with my latte. 

Saturday, February 14, 2015

Macaron Hearts with Raspberry Buttercream


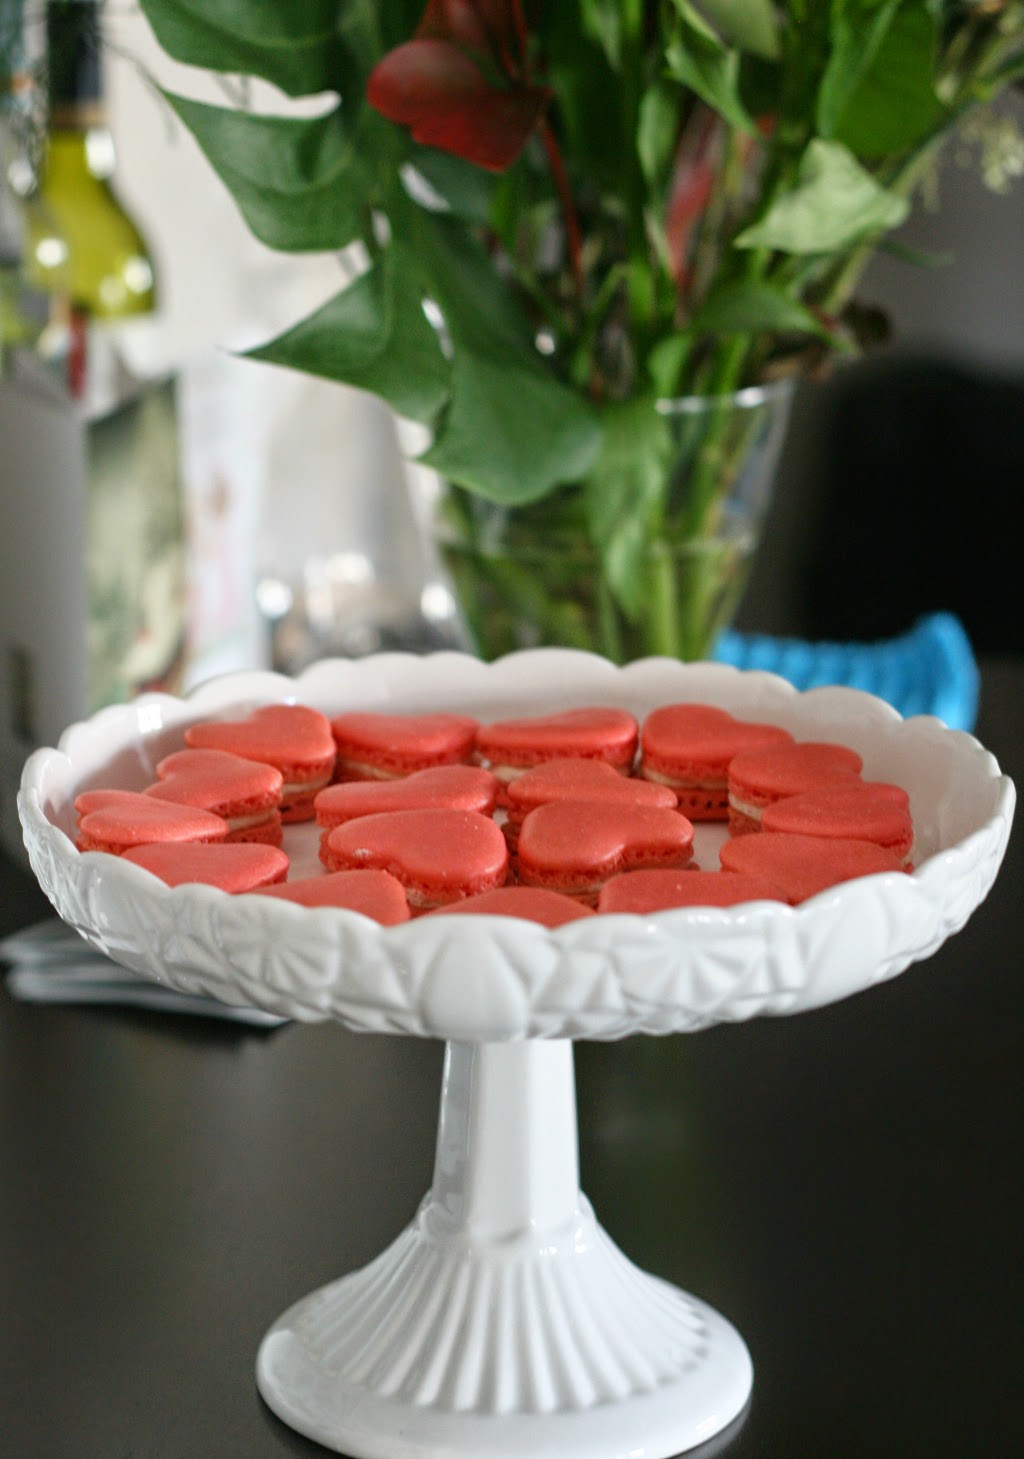
Hello everyone! Hoping you are all having a wonderful Saturday. It was a bit snowy here in Edmonton but the light in the condo thankfully allowed me to take a quick photo of these beautiful heart macarons this morning before the day's festivities. This year's Valentine's day ended being different as we celebrated a friend's wedding! To celebrate I made these heart shaped macarons.

To make the macaron shells follow the instructions I have in my Macaron 101 post and in the Macaron 102 post


It has been a while since I made macarons let alone piping heart shaped macarons! They were a bit tricky to pipe by hand as you need to use a smaller piping tip. To pipe the hearts I piped two individual tear drop shapes for each heart. 


Raspberry Buttercream Recipe
Ingredients: 
  • 80g (approx. 1/2 cup) superfine sugar 
  • 25g water 
  • 1 whole egg 
  • 1 egg yolk 
  • 160g soft butter (cut into cubes) 
  • 1 Tbsp freeze dried raspberries 

Instructions:
  1. Bring sugar and water to a boil in a small pot. Heat the sugar to 250F(120C) using a candy thermometer. If it boils, clean the sides of the pan with a damp pastry brush. Try not to mix the solution, but allow it to heat on its own.
  2. In another bowl or the bowl of your KitchenAid whisk the eggs and egg yolks until it lightens in colour.
  3. Once the hot sugar mixture reaches 250F pour immediately into the whisking egg mixture. Then, increase to a higher whisking speed. Continue whisking until the mixture has cooled down completely. It will start to look like a meringue and be glossy.
  4. Keep whisking the meringue until it has cooled. Meanwhile, cream then whisk the butter until it has thickened. Once the egg mixture-meringue has cooled, add the butter. Add the whisked butter slowly into the meringue.
  5. Continue whisking until the buttercream is smooth. It may curdle slightly but this is okay. Keep whisking and the buttercream will come back together. Add in the tablespoon of freeze dried raspberry. Take a look at this video for making the buttercream.
  6. Once the buttercream has come together, immediately transfer the raspberry buttercream into a piping bag fitted with a nozzle (Here is a quick visual tutorial on piping bag basics). Match macaron shells by size, then pipe a small mound of raspberry buttercream onto each half shell using the smaller piping tip.


I really hope you end up making these macarons! They don't have to be heart-shaped like these ones, even the circular ones will be awesome! With the freeze-dried raspberries in the buttercream they tasted just like fresh raspberries. The sweetness of the shells balanced quite well with the tartness of the raspberry buttercream. 

Sunday, January 18, 2015

Savoury Tomato and Ham Pie with a Cheddar Cheese Pastry Crust


I don't typically plan our meals, as often Dan finds ingredients in the fridge and makes something for dinner. This pie is the product of our "meal planning" (i.e. how to use up a lot of leftover braised pork shoulder). When we thought of what to make with the leftover ham, comfort food came to mind and who doesn't love pie? There is no hard rule that says pies must be sweet and adding cheese to this pie dough not only makes it tasty but also keeps it flaky.

Ingredients

Pastry
  • 2 1/2 Cups All Purpose Flour
  • 3 Teaspoons baking powder
  • 1 Teaspoon salt
  • 2 Tablespoons unsalted butter
  • 2 Tablespoons coconut oil
  • 1/2 Cup of grated cheddar cheese (we used tillamook cheddar)
  • 1/2 Cup of Milk

Filling
  • 2 Tablespoons unsalted butter
  • 1 small onion chopped
  • 1 can of plum tomatoes
  • 3 Cloves of Garlic
  • Approximately 1 cup of leftover roasted ham/pork shoulder chopped
  • 2 Tablespoons All purpose Flour
  • 2 Tablespoons grated parmesan cheese 
  • Salt/Pepper to taste
  • 1 egg white, beaten


Directions

  1. In mixer, add flour, baking powder, salt, butter, coconut oil, and cheese. Beat until combined. Add milk to pull the ingredients together.

  2. Remove the dough from the mixer, wrap it in saran wrap and place it in the fridge for 30-45 minutes. This will help solidify the dough to make it easier to roll out later. Try not to leave the dough in the fridge for too long as it will become very hard, on the other hand leaving the dough in the fridge for too short of a time will result in crumbly dough that doesn't come together.

  3. Meanwhile assemble the ingredients for the filling.

  4. In a medium sized pot, heat the butter. Once the butter has melted add the onions and garlic. Cook until the onion becomes semi-translucent; almost clear.

  5. Add the canned tomatoes and peppers to the sauce. Then add the flour and toss well.


  6. Remove the dough from fridge and split it into into halves.

  7. Coat an 8-inch pie pan with butter. Taking half of the dough, roll it into a circle that is larger than the pie dish.

  8. To transfer the dough to the pan, use the rolling pin.


  9. Use your fingers to push the dough down into the dish.


  10. Fill the pie with the tomato filling. Then, sprinkle the chopped hame into the tomato mixture.


  11. Take the second half of the dough, roll it into a circle, then cut into strips.

  12. Place the strips of dough on top of the pie.

  13. Preheat the oven to 400F. Brush the pie with an egg-white wash.

  14. Bake initially for 10 minutes at 400F, then reduce the heat to 375F and bake the pie for another 35-45 minutes. The pie should begin to bubble when it is ready to eat.


  15. Serve warm.

 Ham, Tomato and Cheese is a classic combination that definitely cannot go wrong. This pie was a hit and a great way to use up leftover meat. We will definitely revisit this pie soon.

Monday, December 29, 2014

So Gouda! Artichoke Appetizers


Christmas 2014 is over, but the New Year is just around the corner! I made these filled artichoke hearts topped with gouda for Christmas Day appetizers and I am sure they will do well for upcoming New Year events and parties! 

For this post, I teamed up with my friend Michelle from The Tiffin Box and Dairy Farmers of Canada (DFC). The DFC provided me with the ingredients to try out one of their recipes from their Winter Warmth Collection titled "Exotic Artichokes with Gouda". 


I really liked the use of fresh herbs for the recipe. I am admittedly not a fan of parsley but with the combination of the fresh mint and dill, I barely noticed! 


In addition to the fresh herbs, the recipe calls for rice, chopped walnuts, seedless grapes, honey and shredded gouda for the topping. 


After all the ingredients are prepped, toss them together in a bowl. You can also place the filling into an air tight container in the fridge until you are ready to assemble the appetizer. I made these for Christmas dinner so I prepared all the ingredients mid afternoon and had the filling sitting in the fridge. Once guests arrived, I topped the artichoke hearts with the filling. I also added a few more gratings of gouda before serving. 


At first, I did have a little trouble topping the artichoke hearts with the filling as very little could be placed into each one. Then, Dan's Dad came to the rescue and suggested slightly pushing the artichokes hearts in to form a deeper vessel for the filling. This seemed to help a lot! We also attempted to cut down the artichoke heart but this resulted in extra artichoke pieces left over and the vessel falling apart completely. 

Overall, all the ingredients worked well together. I would suggest using less honey as the grapes were already quite sweet. I also used a Korean short grain brown sticky rice since that was all we had in the pantry. I am also thinking that getting artichoke bottoms next time would make the assembling of the appetizer much easier. 

So, head on over to the Dairy Farmers of Canada website to download the recipe and explore other recipes with cheese.  

Then, click on Exotic Artichokes with Gouda for the ingredient list and directions. Come on back to ask me any questions if you need! 

Also, remember to check out Michelle's post on her take on the Mediterranean Ricotta Cheese Fritters.

Disclosure: While Michelle and I were provided with the ingredients for our recipes, we were not compensated monetarily for our posts. 

Tuesday, December 23, 2014

Kimchi Roasted Cauliflower


You have probably been reading about how cauliflower is the "new" vegetable to cook with. Or, maybe it is what all the food websites that Dan and I have been reading are telling us. So, of course we needed to try out a recipe to test this theory of how cauliflower is the 'it' vegetable. 

This recipe is inspired by a recipe from the Thug Kitchen Cookbook. There is no frying of any kind which makes this cauliflower dish truly healthy! By adding in the kimchi, it reminds me of a dish from an exciting restaurant in Edmonton called Tavern 1903 (which recently closed) called KFC - Cauliflower Fried Chicken.


Feel free to adjust the spice level to your preference. The kimchi we used in this recipe was one that we had made with friends about a month ago. 1 head of cauliflower is good for 3 to 4 people.

Ingredients

  • 1 Head of Cauliflower
  • 1/2 cup of Flour
  • 1/2 cup of water
  • 1/2 teaspoon of baking powder
  • 1/2 teaspoon of salt
  • 4 tablespoons of kimchi

Instructions

  1. Preheat oven to 375F. Cut up the cauliflower into finger-length chunks.
  2. Start making the batter by mixing flour into the water as this helps to avoid clumps. Once flour is mixed in, add in the baking powder and salt.
  3. Coat the cauliflower pieces with the batter.
  4. Pour the coated cauliflower onto a baking sheet lined with parchment paper.
  5. Bake for 15 minutes at 375F.  Then, set the oven to broil and bake for another 5-10 minutes, until you have your preferred level of browning.
  6. Take the tray out of the oven and gather the hot cauliflower into a pile. Then, slowly mix and fold the kimchi into the cauliflower pile.
  7. Serve immediately. 
We also ended up grating some pecorino romano onto the dish afterwards and it worked perfectly! A friend of ours also thought sprinkling some furikake and toasted sesame onto the dish would work nicely too.

Let me know what you added to your dish in the comments below.